A clear guide to mining Monero using RandomX!
3 min readTable of Contents

If you are a Monero enthusiast and would like to take advantage of it, we have clear instructions for mining through the new RandomX algorithm. It is important that you have a GPU or a stronger CPU available. It is a manual that is validated and tested.
What is RandomX?
Monera passed 30.11.2019 network update successfully and the current cryptonight mining algorithm used was changed to RandomX technology. What’s going on? RandomX ensures random code execution to make it more resistant to ASIC technologies. This is a better chance for CPU / GPU owners, who, if lucky enough, can make much more use than they have ever been.
Step 1: Wallet
Before mining it is important to make sure you have a wallet. The best place to install is the main page https://web.getmonero.org/downloads/. It is ideal to use this official wallet, but you can also use a wallet Coinomi or other. I emphasize that you should not use the wallet address from the stock exchange when mining. Your extracted Monero may never arrive there.
If you have installed an official wallet, then you have to wait for the blockchain to download to your pc. This can in principle take several hours.
Step 2: Mining software
In this case we will use a well-known mining software called XMRIG.
After clicking on the link, go to the “Downloads” section and click on the “Releases” tab. On this page you will see several versions. If you are using a Nvidia card, you will need a version with “cuda10_1” extension. Continue and download the .zip file and extract it to safe storage. Please note that if you do not see the following executable file after unpacking the folder, it is likely that your antivirus has flagged it as malicious. It should be quarantined and marked as safe:

Step 3: Pools
Okay, so we have a wallet and we have a miner. There are many pools with different fees / pay levels etc. I suggest only a few that do not require registration:
- 2Miners – https://xmr.2miners.com
- Fee – 1%
- Min. Payout – 0.1 XMR
- MineXMR – https https://minexmr.com/#getting_started
- Fee – 1%
- Min. Payout – 0,005 XMR
I used MineXMR.
Step 4: Mining
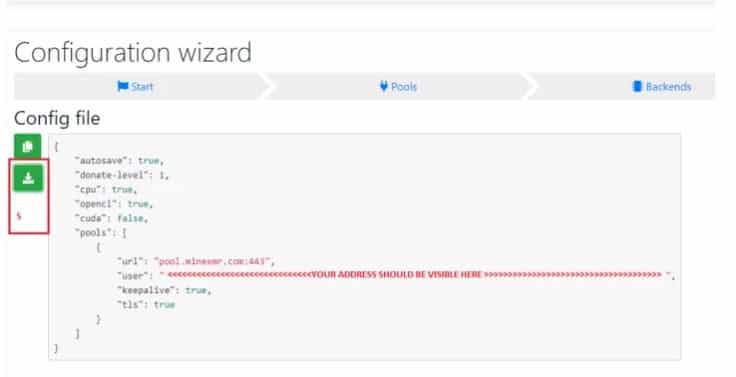
After generating the receive address of the wallet and copying it to the clipboard (CTRL + C), go to https://xmrig.com/wizard#start. This is a handy setup wizard that guides you through all the necessary information in the configuration file in a simple way:
- 1 – Click New Configuration
- 2 – Select the pool and enter your wallet address (from clipboard) in the field after selecting
- 3 – I chose the CPU, but you have the choice of GPU (CUDA for Nvidia, OpenCL for AMD cards)
- 4 – Choose the donate level (min. 1%, in addition to the 1% common fees paid to miner developers)
- 5 – The file is complete, click the download button and save it to the XMRIG folder
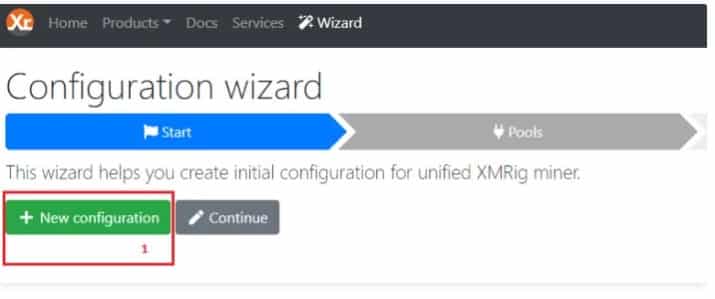
After saving the configuration file, just double-click the XMRIG executable file and the command window should open. It may take a few seconds for the initial miner configuration to complete, but when it is started it looks like this:
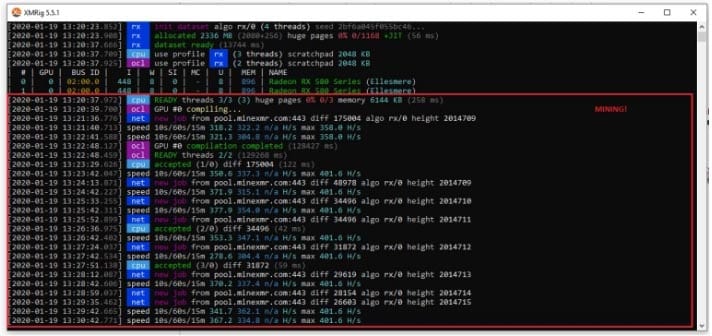
Congratulations, you started to mine XMR!
You can check your statistics on the MineXMR page. To do so, go to https://minexmr.com/#worker_stats in your favorite browser and enter the address of your wallet you are looking for. You don’t have to keep your XMR wallet open, just check back and forth to see if anything goes there.


