Even though the PlayStation Store offers several apps, you won’t find VPN applications there. However, there is still a way to unblock media content on your console. With that said, here’s how to set up and use ExpressVPN on PlayStation.
1. Go ahead and subscribe to ExpressVPN (click on the provided link).
2. Once you get to ExpressVPN’s website, click on any of the ‘Get ExpressVPN‘ buttons.
3. Pick a subscription plan, input your email, and finalize the payment procedure.
4. Once you subscribe, expect to receive a confirmation mail from ExpressVPN’s team.
5. Now, return to ExpressVPN’s website. Make sure to be on its homepage.
6. Click on ‘My Account‘ using the website’s main menu (in the top-right corner).
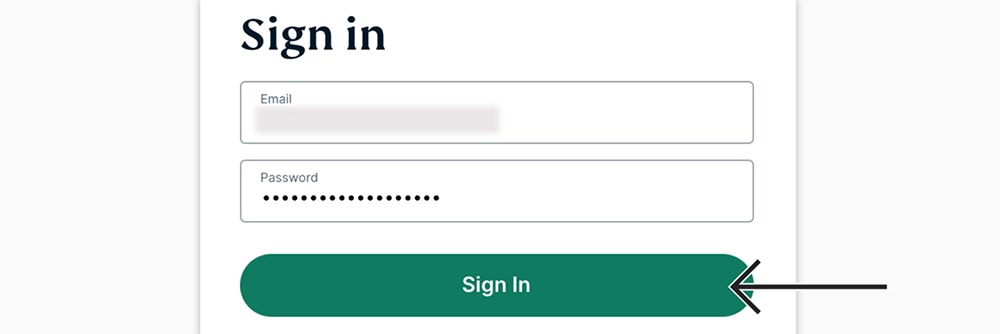
7. Provide your email address and password, and click on ‘Sign In.’
8. If asked for a verification code, check your email inbox and paste the code from there.
9. When you access your online dashboard, make sure to click on ‘DNS Settings.’
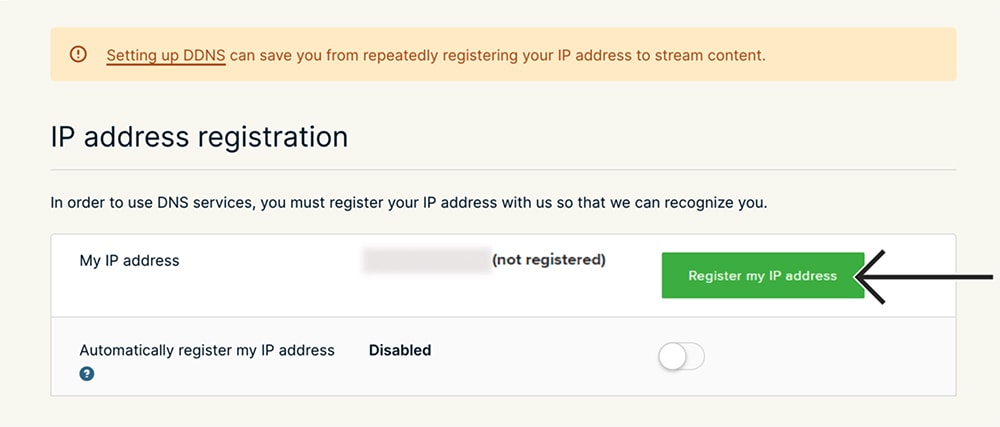
10. First, click on ‘Register My IP Address‘ (in the ‘IP Address Registration’ segment).
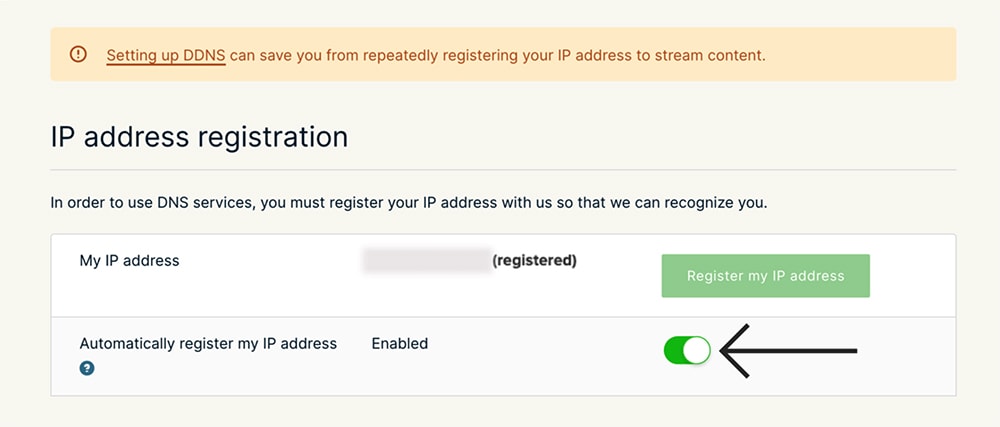
11. Then, flip the switch next to ‘Automatically Register My IP Address.’
12. Double-check if everything is set correctly, and check for any possible errors.
13. Return one step to your online dashboard. Click on ‘Set Up Other Devices.’
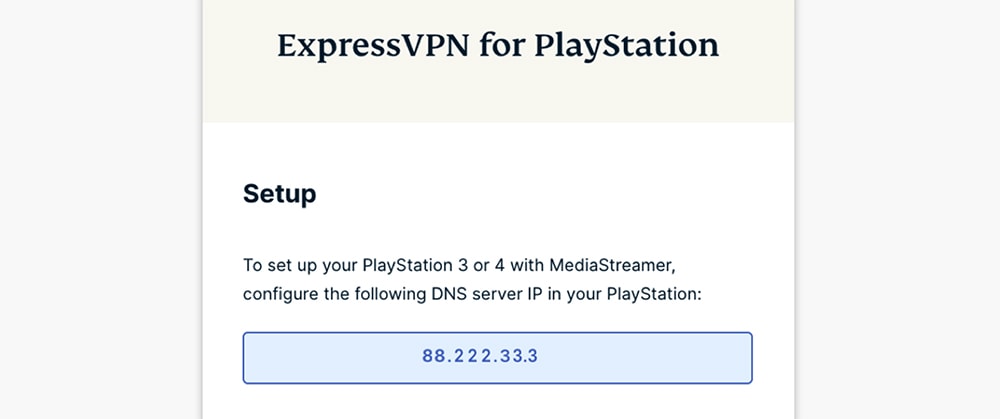
14. A new page will open. Select ‘PlayStation‘ among the supported platforms (on the left).
15. On the right, make a note of your DNS server IP. Leave this page open.
16. To complete this procedure, turn to your PlayStation console.
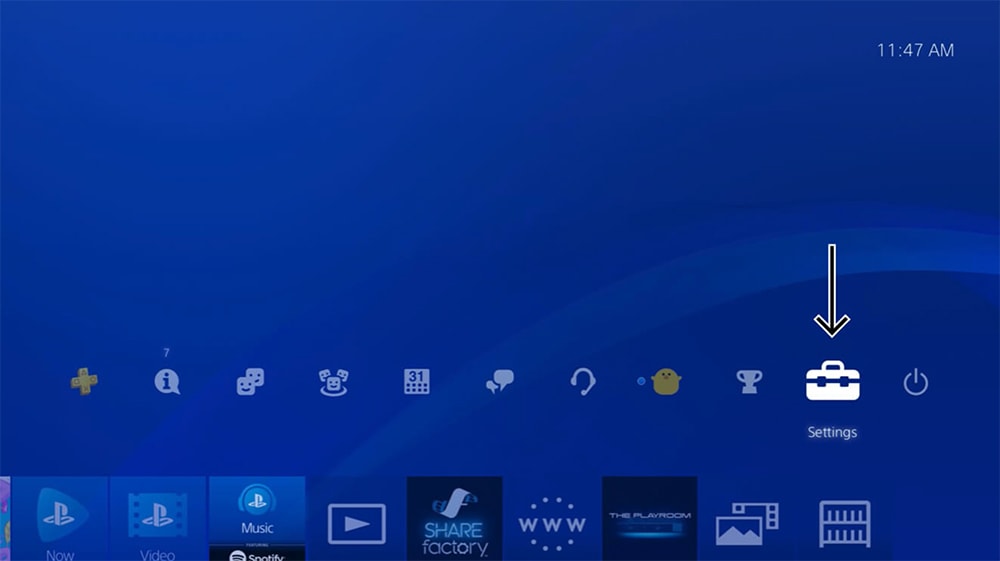
17. Navigate to the main menu (at the top of your screen) and pick ‘Settings.’
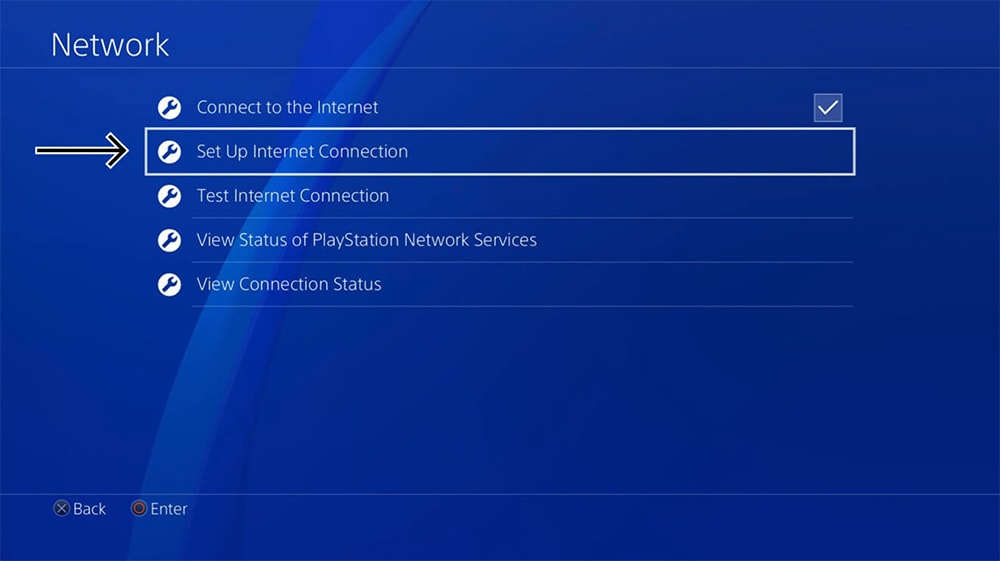
18. Then, navigate to Network > Set Up Internet Connection.
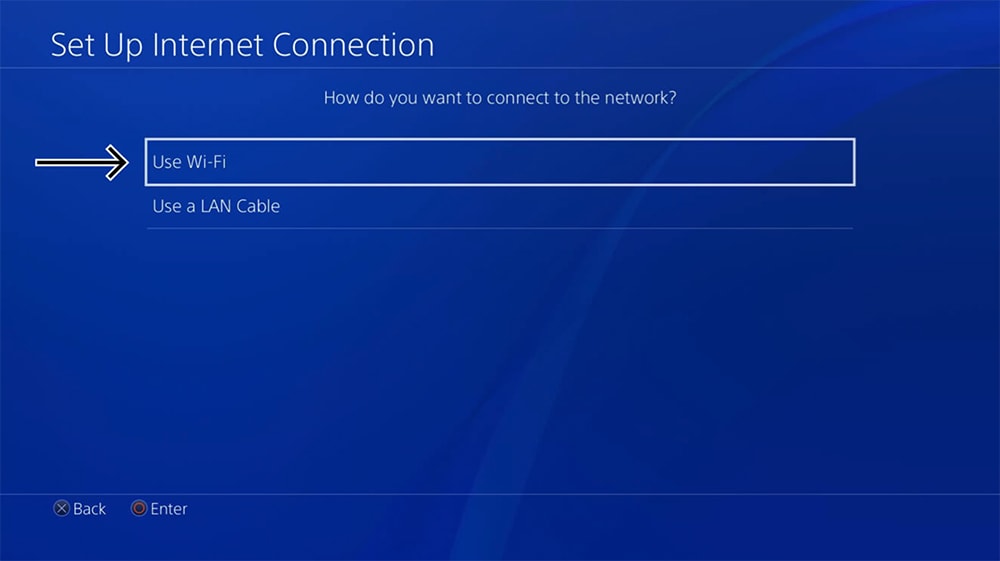
19. When asked about the type of connection, pick ‘Use Wi-Fi.’
20. If asked to use your existing Wi-Fi settings, make sure to select ‘Yes.’
21. You will also be asked about how you want to proceed. You need to pick ‘Custom.’
22. Pick your current Wi-Fi (your home Wi-Fi network) and provide its password.
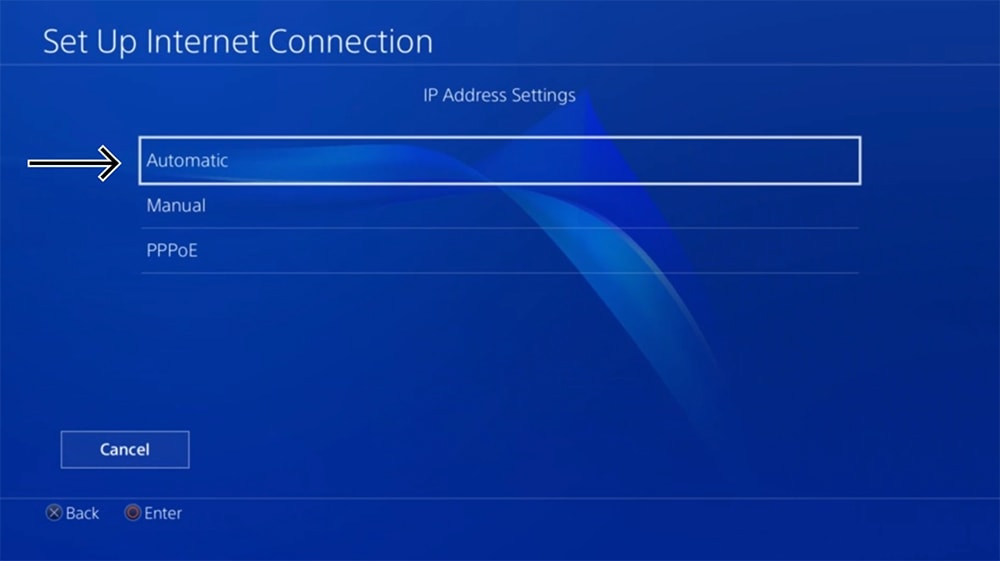
23. Then, you will be asked about your IP address settings. Pick ‘Automatic‘ here.
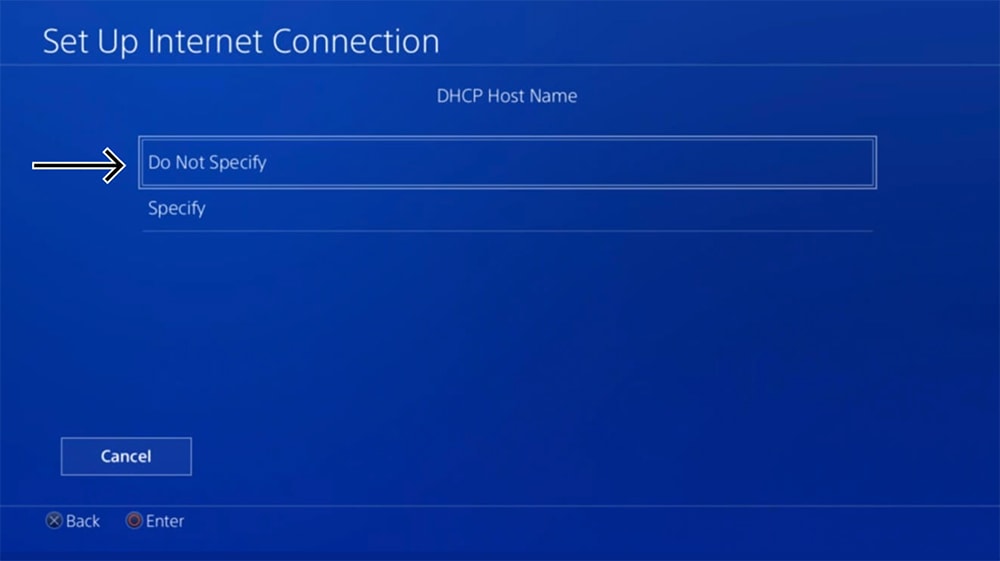
24. When asked about your DHCP host name, feel free to pick ‘Do Not Specify.’
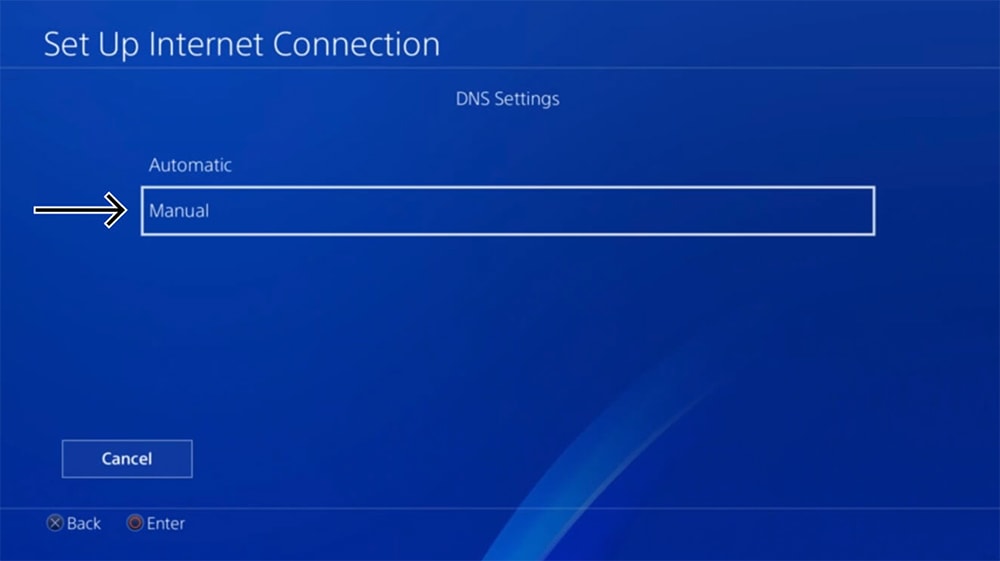
25. And when asked about your DNS settings, make sure to pick ‘Manual.’
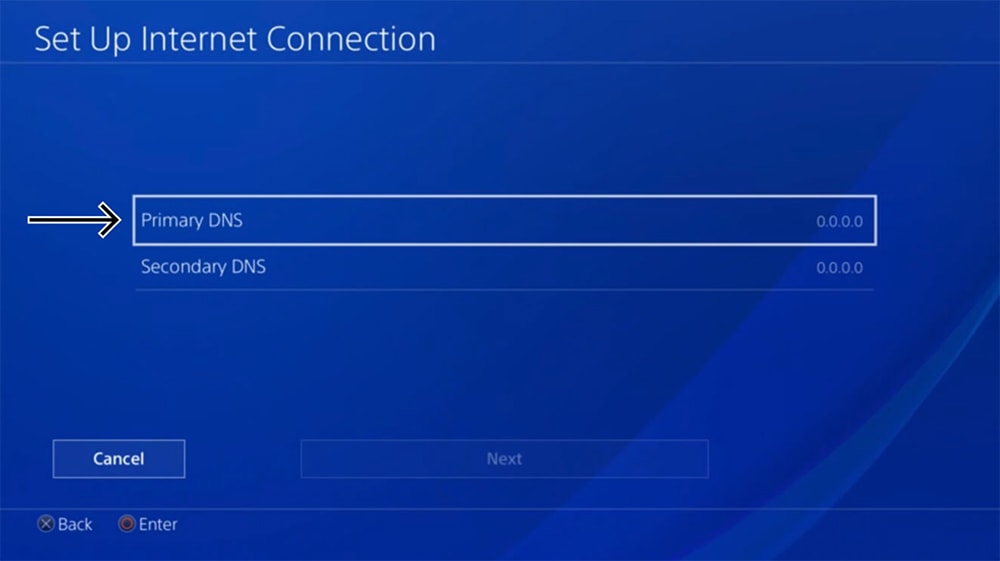
26. Select ‘Primary DNS‘ and copy your DNS Server IP from ExpressVPN’s website.
27. You can feel free to leave the secondary DNS as is – set to 0.0.0.0.
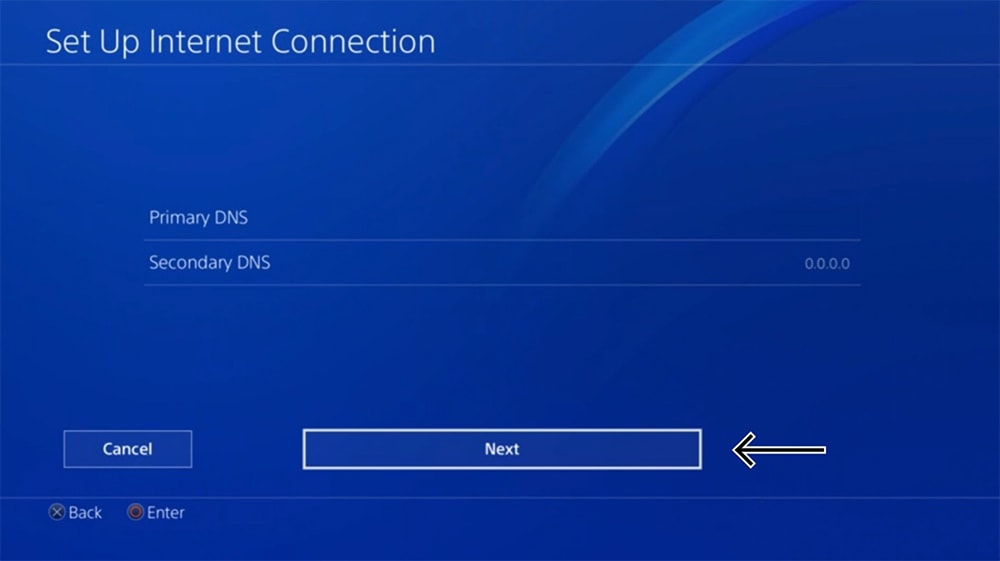
28. Then, highlight and select the ‘Next‘ button (at the bottom) to proceed to the next step.
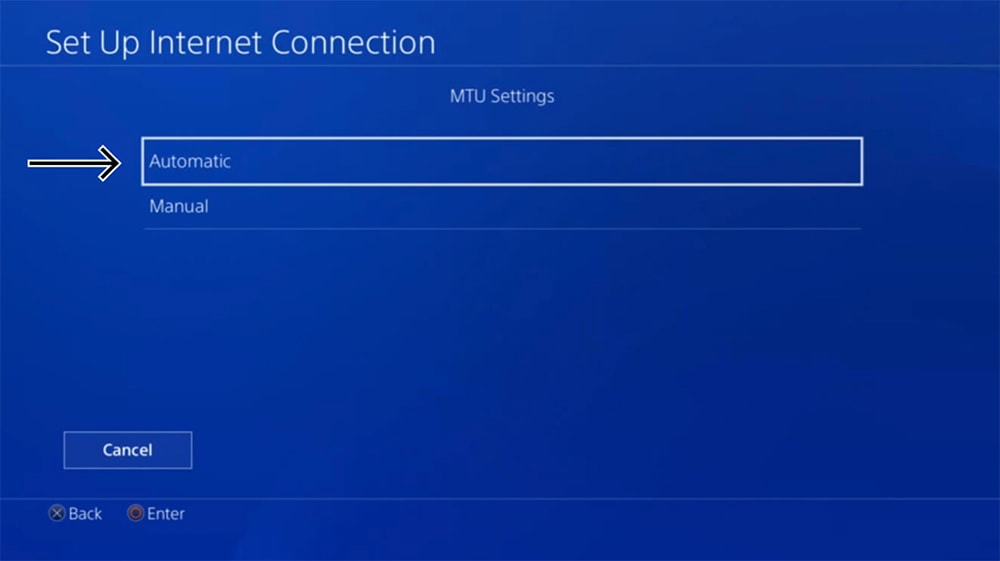
29. When it comes to MTU settings, you can pick ‘Automatic.’
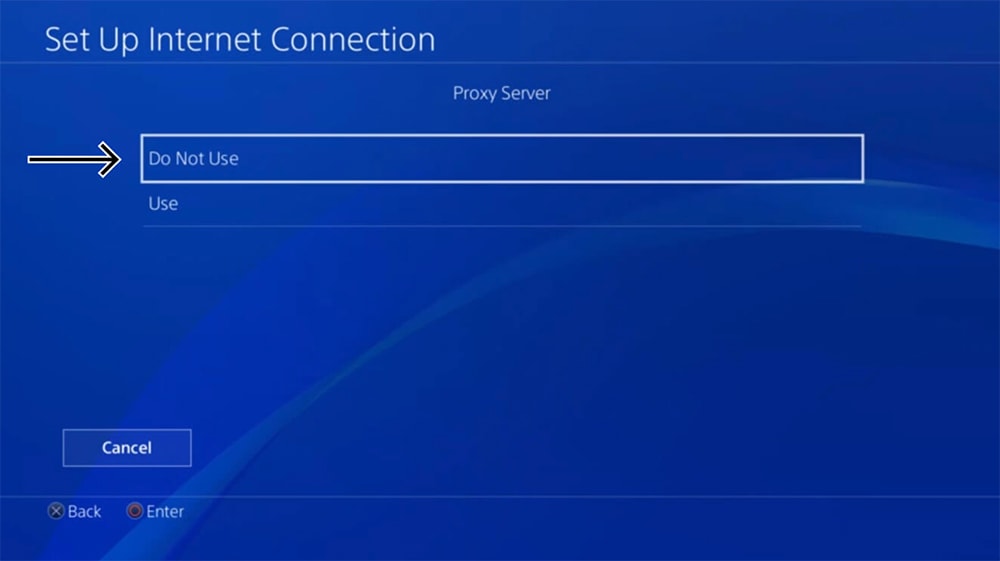
30. And when it comes to a proxy server, pick ‘Do Not Use.’
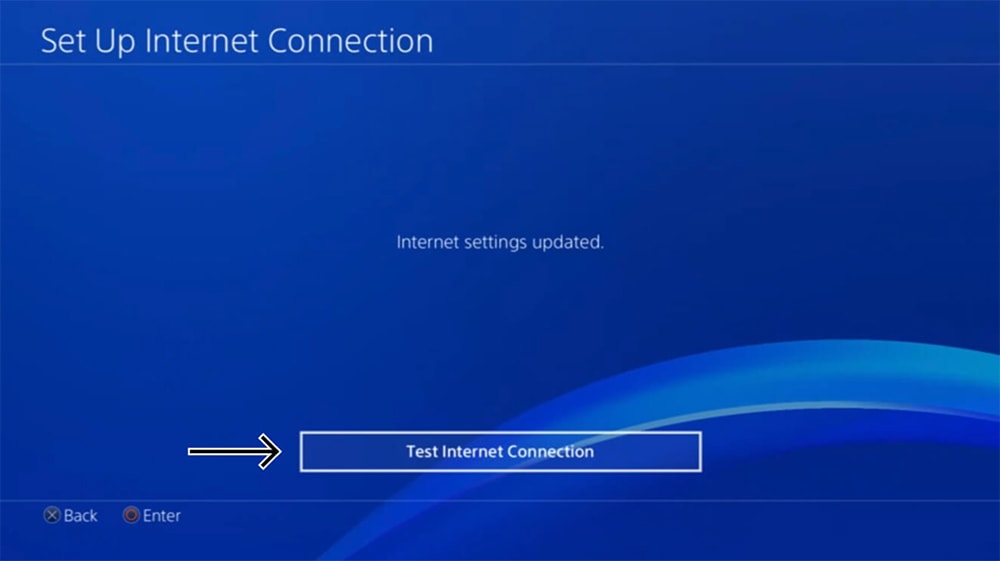
31. Finally, select ‘Test Internet Connection‘ and wait for the results.
32. Hopefully, all will go without errors, so you can finalize this procedure.
33. And lastly, make sure to restart your PlayStation for the DNS changes to take effect.
That would be all on how to set up and use ExpressVPN on PlayStation. If you’ve encountered any errors or have any questions for us, make sure to post your comment below. And finally – thank you for reading!
- CryptoQuant Analyst: Bitcoin Nowhere Near Its Peak – Buckle Up, Hodlers! - December 21, 2024
- Chainalysis: $2.2 Billion Lost to Crypto Hacks in 2024 - December 21, 2024
- Bank of Japan leaves interest rate unchanged: Impact on the macroeconomy and the crypto market - December 20, 2024

