In this article, you will find step-by-step instructions on how to set-up ExpressVPN on Windows. That means that we’ll show you how to download, install the app, and then connect to a secure server, protecting your online data.
- First and foremost, make sure to subscribe to ExpressVPN (use the provided link).
- Click on ‘Get ExpressVPN,’ pick a subscription, and input your information.
- Once you subscribe to ExpressVPN, return to the VPN’s homepage.
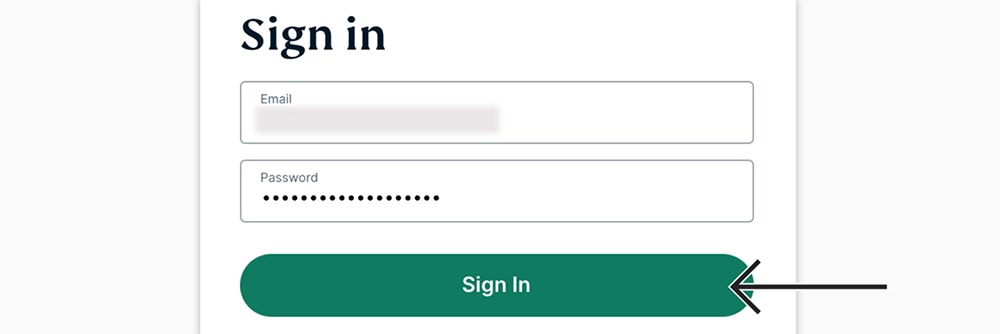
- Click on ‘My Account‘ using the top-placed main menu on ExpressVPN’s website.
- Input your credentials and log-in to your online account dashboard.
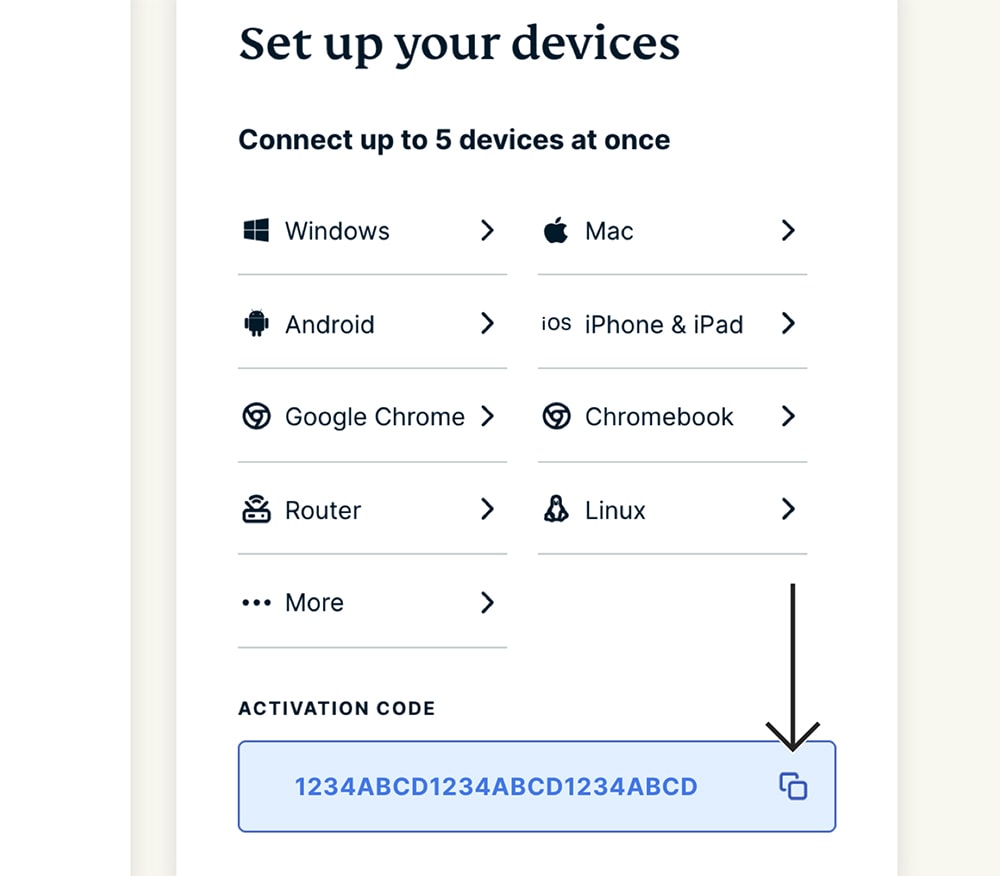
- Use the top-placed banner to click on ‘Download for Windows.’
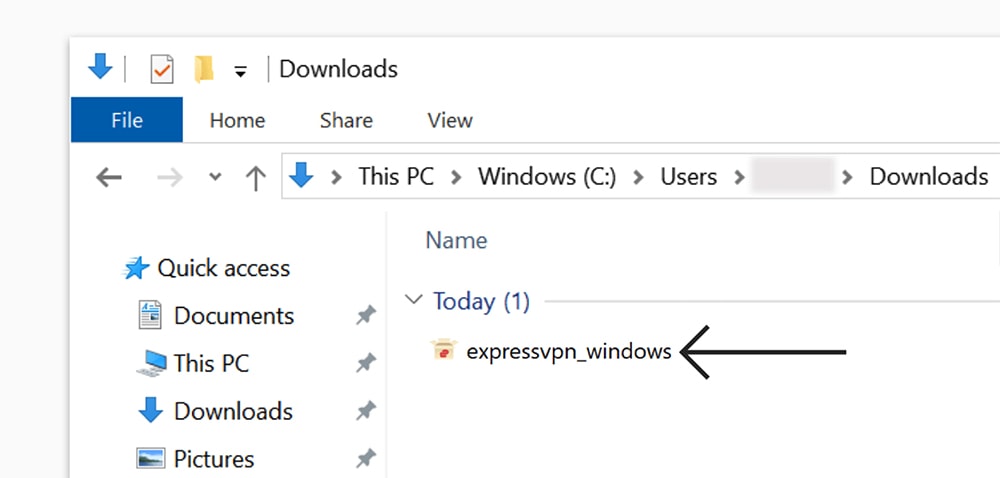
- Locate ExpressVPN’s installation file on your Windows PC and double-click on it.
- You might be asked to confirm your decision, so click ‘Install‘ to proceed.
- Install ExpressVPN like you would install any other type of software.
- Once done, go ahead and launch the VPN application.
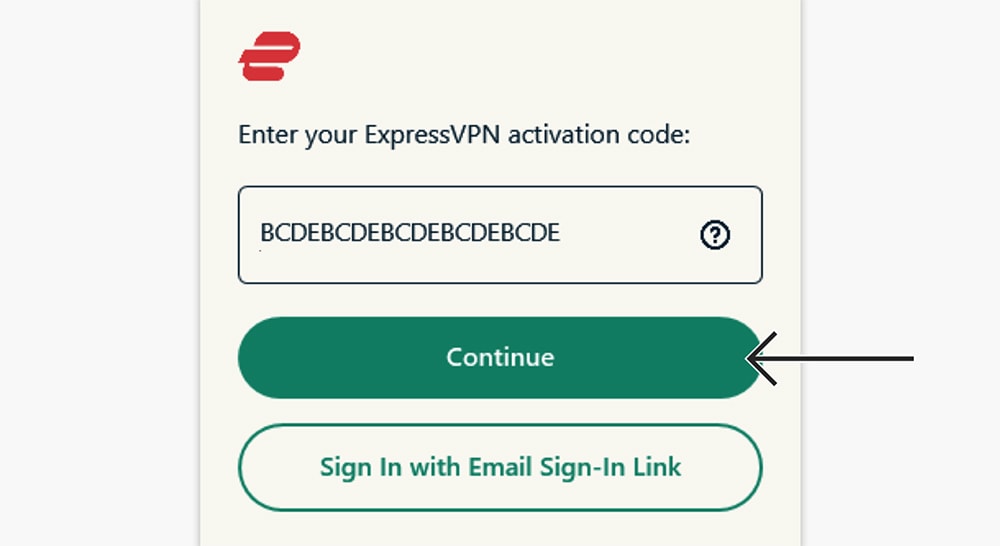
- Select ‘Sign In‘ and then paste your activation code (that we mentioned earlier).
- Click on ‘Continue‘ to log-in to your ExpressVPN account/subscription.
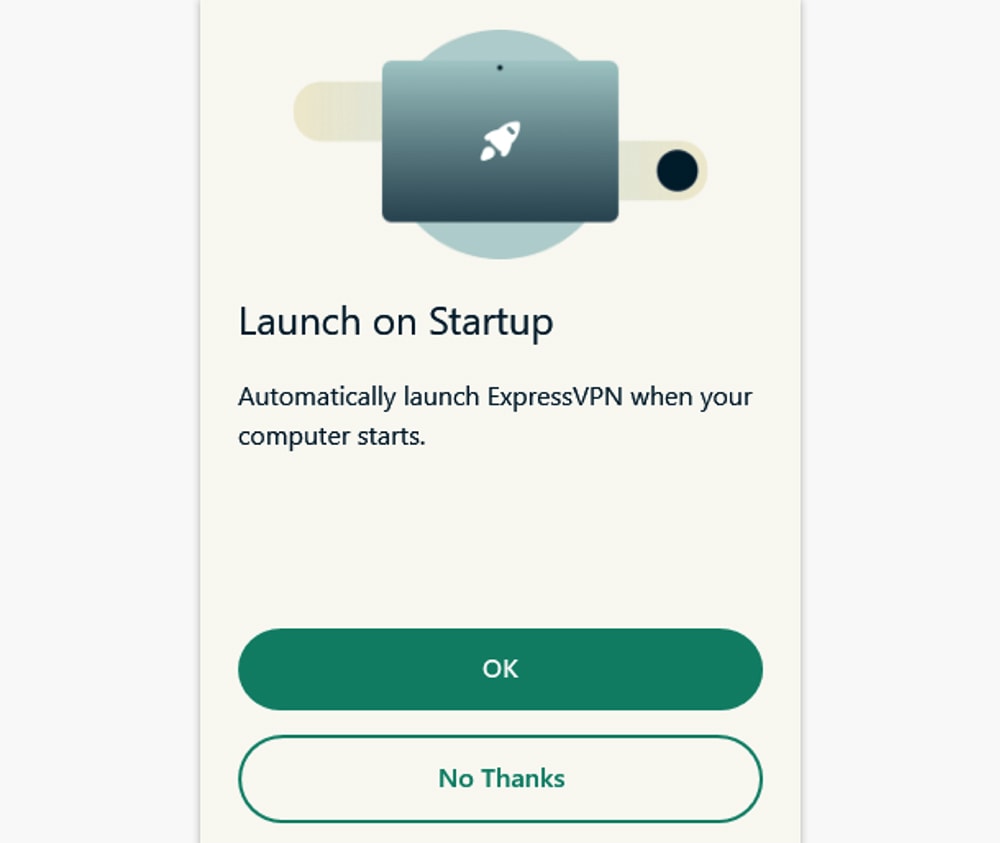
- Decide whether you want the VPN to launch on start-up (select ‘OK’ or ‘No, Thanks’).
- Choose if you want to send anonymous data (select ‘OK’ or ‘No, Thanks’).
- At this moment, you should see ExpressVPN’s home screen, ready to be used.
- To connect to the closest server, press the ON/OFF button.
- To disconnect, press the ON/OFF button again and wait a couple of moments.
- To connect to a different server, click on the ‘Selected Location‘ button.
- Pick a country or an individual server, and then double-click on its name.
- After a few moments, ExpressVPN will secure your Web traffic. That’s it!
That would be all on how to download, install, and use ExpressVPN on Windows. If you have any questions on your mind, please post your comment below. Thanks for reading!
Latest posts by Margharet Tess (see all)
- Is This the End of the Crypto Bull Market? - February 26, 2025
- SEC vs. Ripple Lawsuit Takes a Shocking New Turn - February 25, 2025
- Deep Dive: Why U.S. National Debt Has Reached Unprecedented Levels - February 25, 2025








![How to Buy X Stocks [Twitter] – A Step-by-Step Guide 61 How to Buy X Stocks [Twitter] – A Step-by-Step Guide](https://cryptheory.org/wp-content/uploads/2025/02/2-14-120x86.jpg)


