Aside from using the ‘Roku Channel Store,’ there’s another way to get more content on your Roku media streaming device. Yes – we’re talking about private Roku channels, many of which come with unique content libraries. So, we’ll show you how to install hidden and private Roku channels, which is a straightforward and quick procedure. Take a look just below.
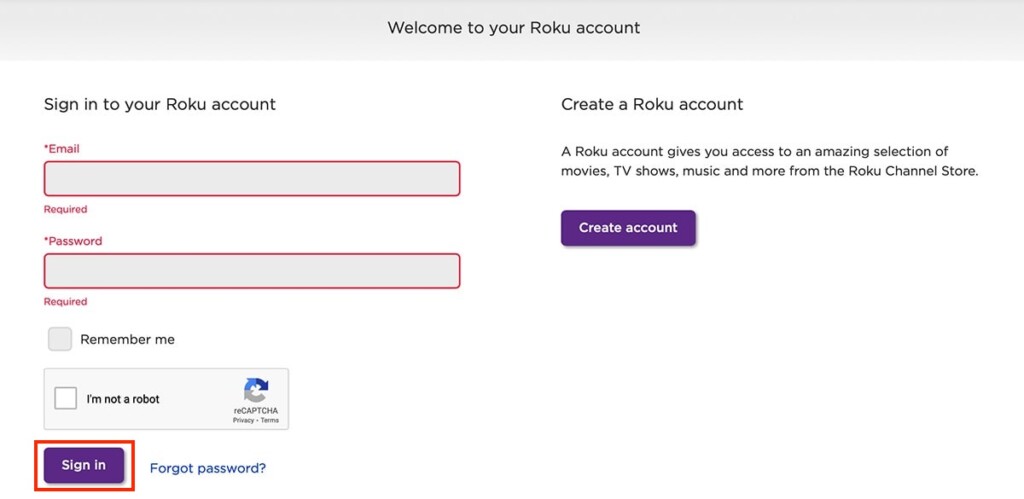
1. Begin by visiting my.roku.com – using your computer, tablet, or smartphone.
2. You’ll have two options now, to create a new account or log in to an existing one.
3. Many of you are already Roku users, so input your credentials on the left and log in.
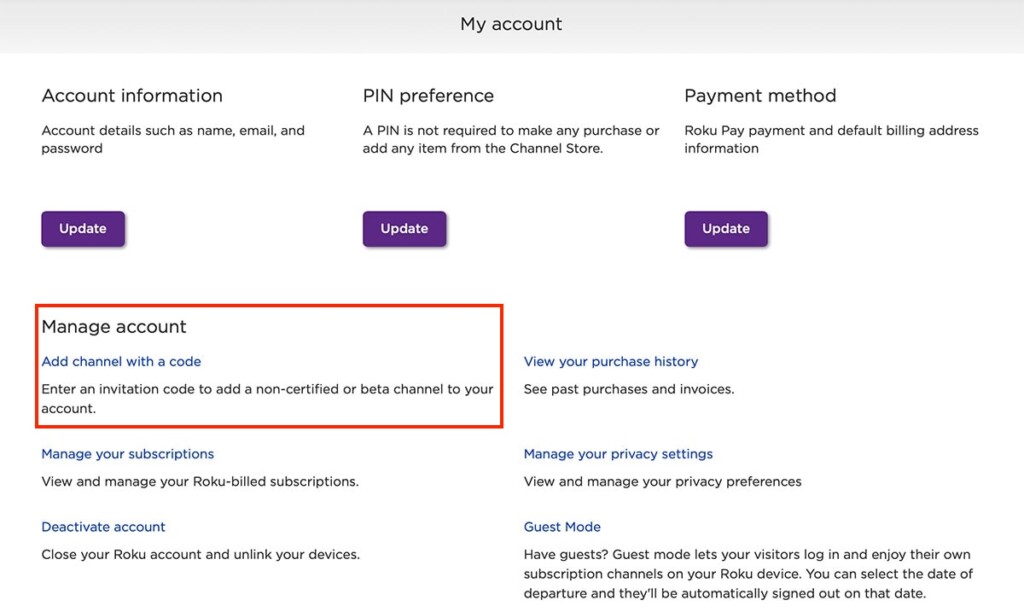
4. Once you log in, look for a group of options called ‘Manage Account‘ (on the left).
5. Then, select ‘Add Channel with a Code.’
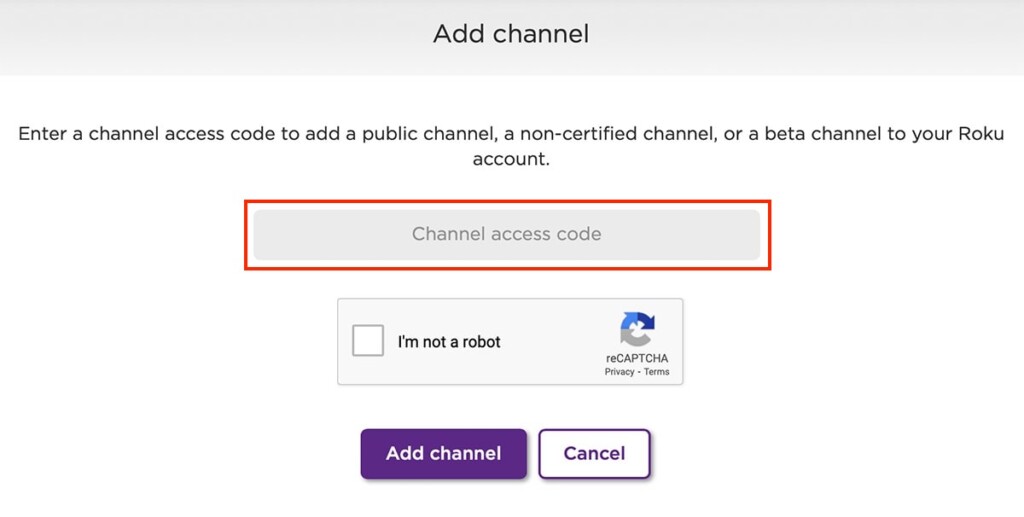
6. At this point, you’ll be asked to input a channel code. More on that just below.
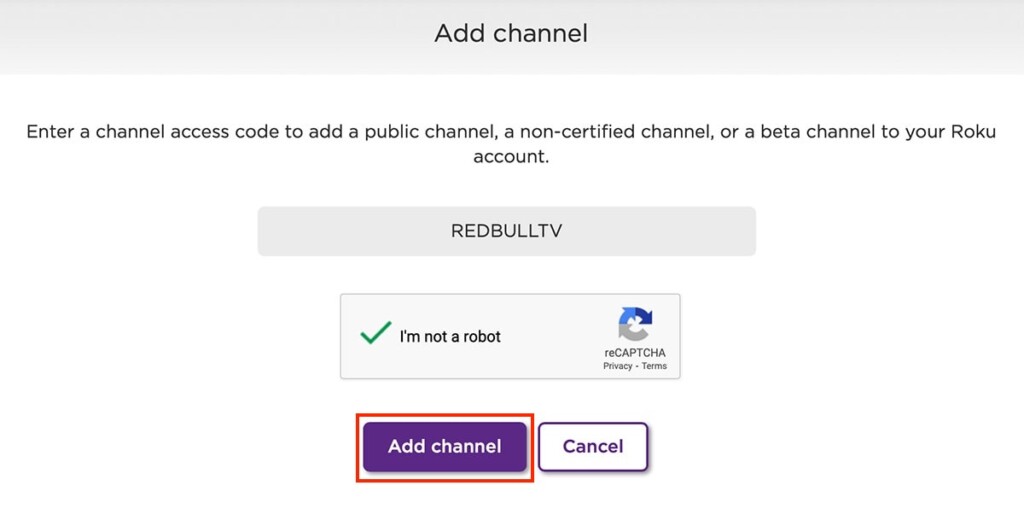
7. Once you copy the access code, make sure to click on ‘I am not a robot.’
8. Complete the verification process you’ll see on your screen (if asked to do so).
9. Then, click on the purple-colored ‘Add Channel‘ button.
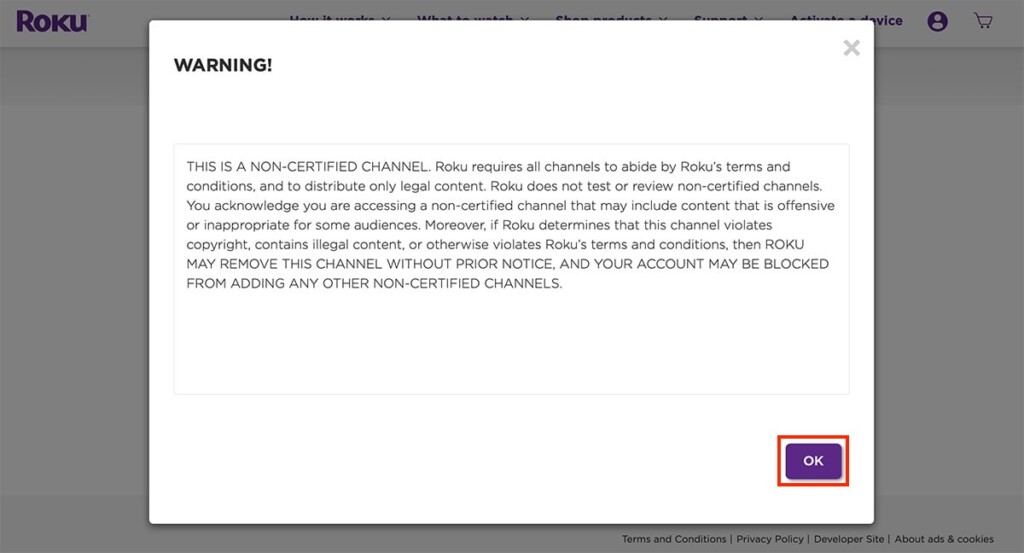
10. After a few seconds, Roku will show you a warning. Read it, and click on ‘OK.’
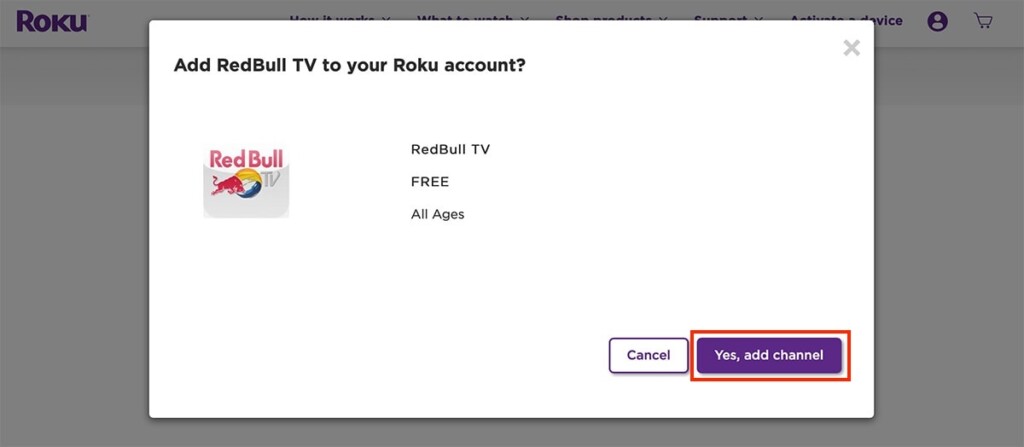
11. And finally, click on ‘Yes, Add Channel.’
That’s it! You have now added a new private Roku channel, which will be tied to your Roku username. However, keep in mind that it can take up to 24 hours for new channels to appear on your Roku. And of course, you need to be signed in to your Roku account on the media streaming device you plan to test the new channel on.
That would be all on how to install private Roku channels. If you have any questions, don’t hesitate to post a comment below. We’ll do our best to respond as soon as possible. And lastly, thank you for reading!

