Table of Contents
Your MacBook comes with many battery-saving technologies. One of those is your notebook’s behavior when you close its lid, as this puts your computer to sleep instantly. So, what if you need your computer to run, even while you’re on-the-go? Is there a way to prevent your MacBook from sleeping when the lid is closed? The answer is – yes!
Keep in mind that macOS doesn’t let you change your computer’s behavior in this sense (unless you’re willing to keep it plugged-in). So, you’ll need to rely on workarounds, which prompts you to use either additional software or hardware. With that said, here’s everything that you need to know right now.
Prevent Your MacBook from Sleeping (When Closed) via These Three Methods!
Right now, you have three options available. All of those will produce the same result – keeping your MacBook awake while either being plugged-in or using its battery power. So, let’s take a closer look at these three options.
Method #1: Keep Your Mac Awake While Plugged-In
Keep in mind that this method requires your MacBook to be plugged-in. In other words, this method applies only to situations when your notebook uses its power adapter.
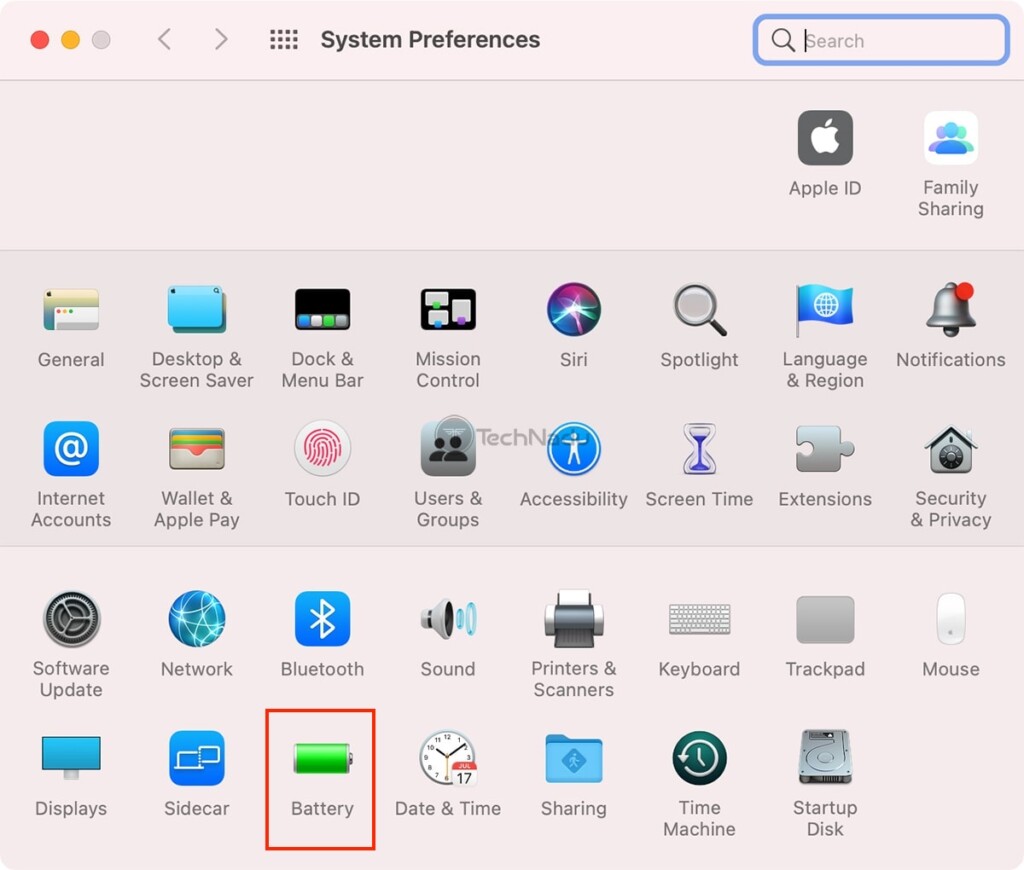
- Click on the Apple logo in the top-left corner of your MacBook’s screen. Then, navigate to System Preferences > Battery.
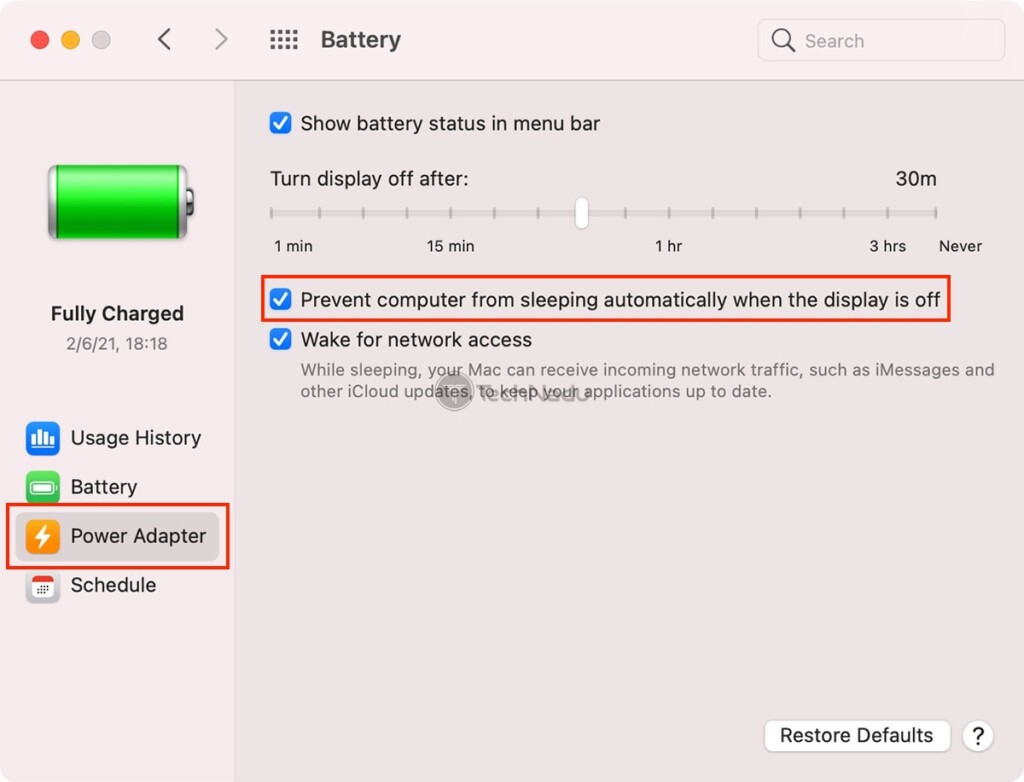
- Using the left-placed sidebar, you need to click on ‘Power Adapter.’ This will list a small group of options related to your MacBook’s behavior while your computer uses its power adapter.
- You need to check the box next to ‘Prevent Computer from Sleeping Automatically When the Display is Off.‘ You can also play around with the slider above this option, letting you fine-tune when the display should turn off.
- We also recommend checking the box next to ‘Wake for Network Access.’ This allows your Mac to receive incoming Web traffic even while sleeping (which only works in select macOS apps).
- That’s it! Remember that the adjustments you’ve made will activate only when your MacBook is plugged-in (they won’t activate if you want to prevent your MacBook from sleeping if you need it awake on-the-go).
We’d also like to note that you shouldn’t worry about leaving your MacBook Pro/Air plugged-in overnight. That won’t affect its battery in the long-term. And aside from that, it’s also perfectly safe to use your MacBook Pro/Air while charging. Make sure to use the provided links to learn more.
Method #2: ‘Amphetamine’ Keeps Your Mac Awake (Even With the Lid Closed / Using Battery Power)
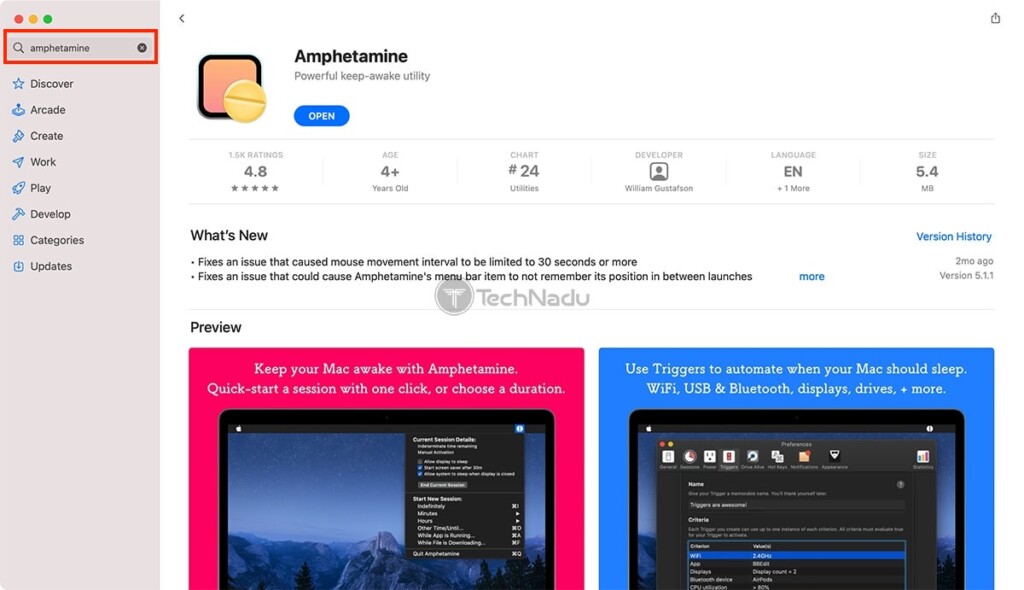
Here, we have a handy utility application called Amphetamine. You can get it from the Mac App Store free-of-charge, and it comes with an unbelievably convenient set of features. So, here’s how to use it to prevent your MacBook from sleeping when the lid is closed.
- First and foremost, download Amphetamine from the Mac App Store. Use the provided link to launch the Mac App Store on your computer, and then click on ‘Get.’ Enter your Apple ID credentials and download the app.
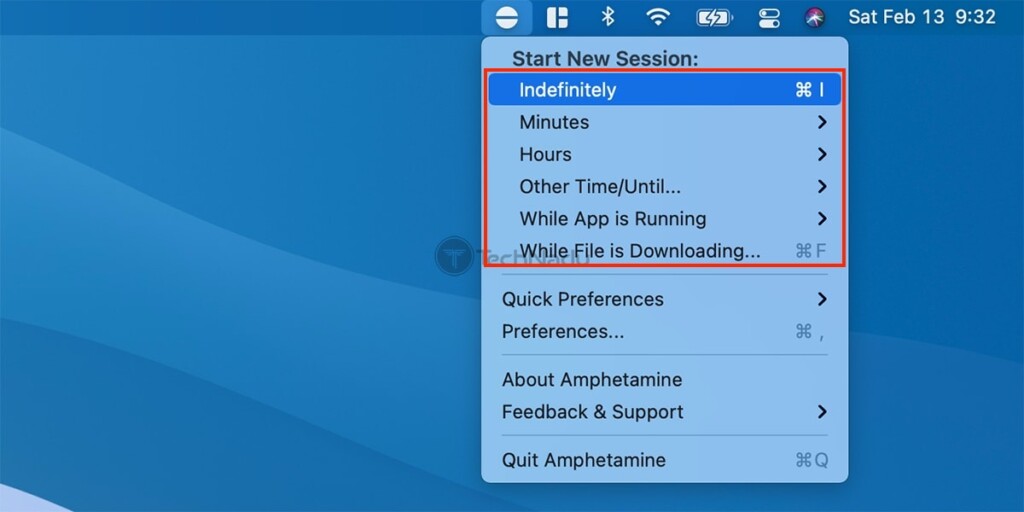
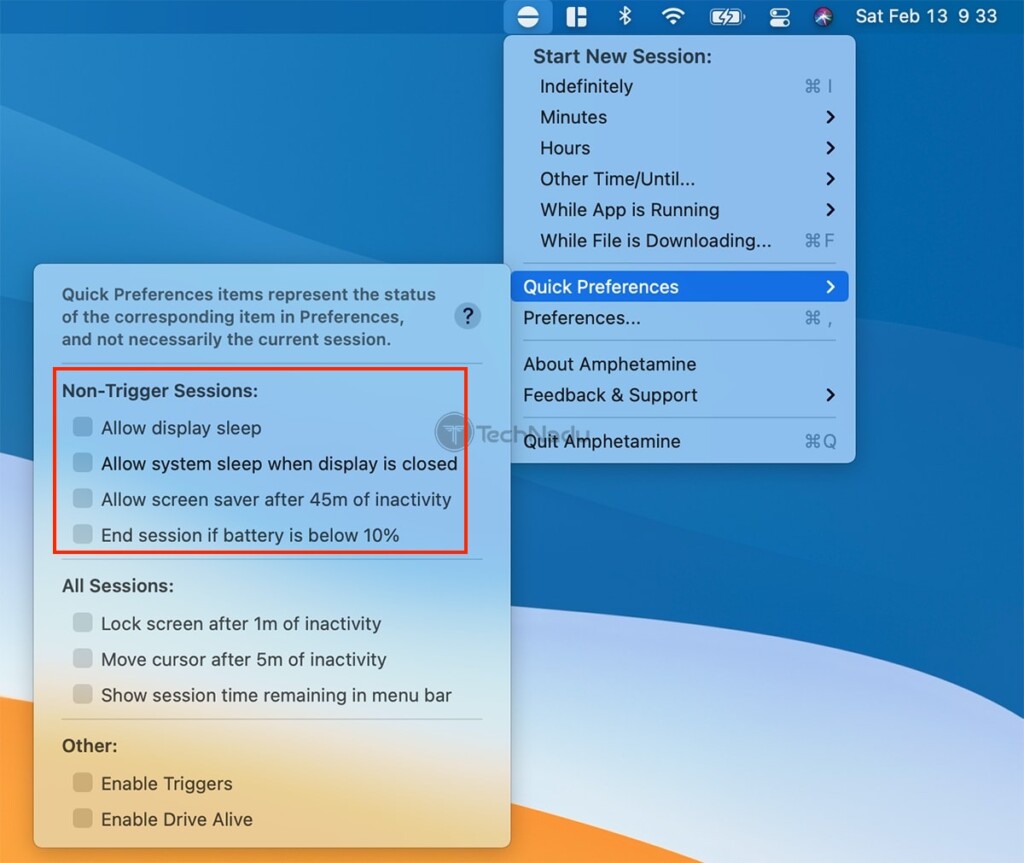
- Then, launch Amphetamine (you can find it in the ‘Applications’ folder). Keep in mind that this is a menu bar app, which doesn’t have a fully-featured interface. Instead, you activate it by clicking on its pill-shaped icon. So, go ahead and click on the icon in the top-right corner of your screen.
- A dropdown menu will appear, letting you activate a new (no sleep) session. There’s plenty to choose from, including running a session indefinitely, setting a specific time, or setting a particular duration (in minutes or hours). The quickest way to start is to right-click on Amphetamine’s icon to activate the application manually.
- However, before you start your first session, we recommend checking the application’s settings. Click on the app’s icon and navigate to ‘Quick Preferences.’ To make sure your notebook’s battery doesn’t deplete in an instant, click on ‘Allow Display Sleep.’ Also, to keep your MacBook awake at all times (even when its lid is closed), uncheck the box next to ‘Allow System Sleep When Display is Closed.’ And lastly, we recommend using the ‘End Session if Battery if Below 10%‘ option.
- That’s it! You can now feel free to activate a new Amphetamine session, which will keep your Mac awake. Of course, you’ll also get to close its lid, which won’t put your notebook to sleep.
Method #3: Prevent Your MacBook From Sleeping Using an External Display & Peripherals
If you have an external monitor available, you can use it to turn your MacBook into a desktop-like computer. While doing so, you’ll instruct your computer not to use its energy-saving technologies, keeping it awake as long as you want. This is what’s also known as ‘closed-clamshell’ or ‘closed-display’ mode. So, here’s what you need to do.
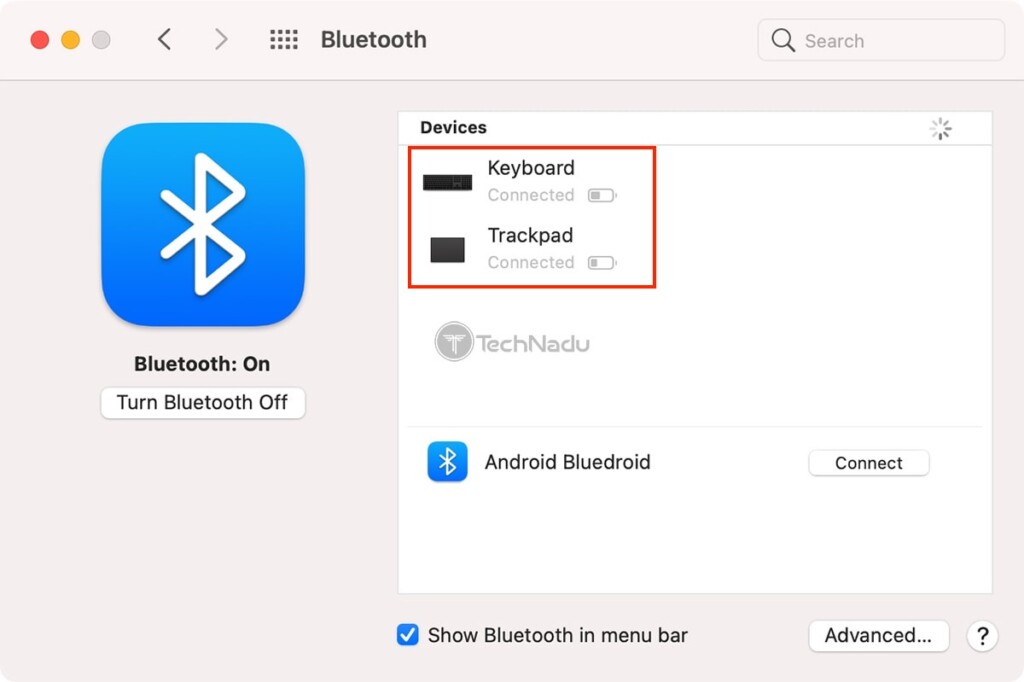
- First, you need to connect a keyboard and a mouse to your MacBook. The best method to achieve this is to use Bluetooth-compatible peripherals. So, put your keyboard and mouse into pairing mode, and then go to Apple > System Preferences > Bluetooth. Use that window to connect to your keyboard and mouse.
- Then, you need to connect your MacBook to power using its default AC power adapter. However, there’s a way to bypass this if you have a relatively new monitor. That’s because some monitors can charge devices via USB-C or Thunderbolt 3 ports, which gives you one extra available port on your MacBook.
- The next step requires you to connect your external display to your MacBook. For this to happen, you need to use the appropriate port on your Mac. Since this can be a bit confusing topic (especially if you have an older monitor), we recommend checking this article on Apple’s video adapter (via Apple’s Support pages). Keep in mind that your external monitor must be connected to power using one cable and connected to your MacBook using a video/audio cable.
- Once you connect your MacBook to the external display, your notebook’s desktop will immediately appear on the external display. That’s when you can close your computer’s lid (and your MacBook will stay awake, of course).
So, those would be the three ways to prevent your MacBook from sleeping while the lid is closed. If you have any questions, know that we’re here for you. So, feel free to post your comment below. And lastly – thanks for reading!
- CryptoQuant Analyst: Bitcoin Nowhere Near Its Peak – Buckle Up, Hodlers! - December 21, 2024
- Chainalysis: $2.2 Billion Lost to Crypto Hacks in 2024 - December 21, 2024
- Bank of Japan leaves interest rate unchanged: Impact on the macroeconomy and the crypto market - December 20, 2024

