Table of Contents
Apple’s Notes app has become one of the most capable apps of its kind. Thanks to the ability to store all sorts of data (text, images, drawings, etc.), this app can hold very precious data. So, what can you if you delete a note accidentally? Well, one thing is sure – you’ll want to know how to recover deleted notes on your iPhone without a backup.
First of all, know that recovering lost notes is possible. There are a couple of ways to achieve that, and we’ll walk you through both of those methods. And once you recover your data, don’t forget to back it up on time, with Apple’s iCloud being the most convenient backup solution available (helping you prevent situations like this one in the future).
2 Methods to Restore Deleted Notes on Your iPhone – If You Don’t Have a Backup!
As mentioned above, these are two ways to restore accidentally deleted notes on your iPhone or iPad. We’ll first show you a handy trick found in the Notes app, and then we’ll advise you to use a third-party app to scan your device for recoverable notes. Here’s all you need to know.
Method #1: Restore Deleted Notes via the Notes App (Using Your iPhone)
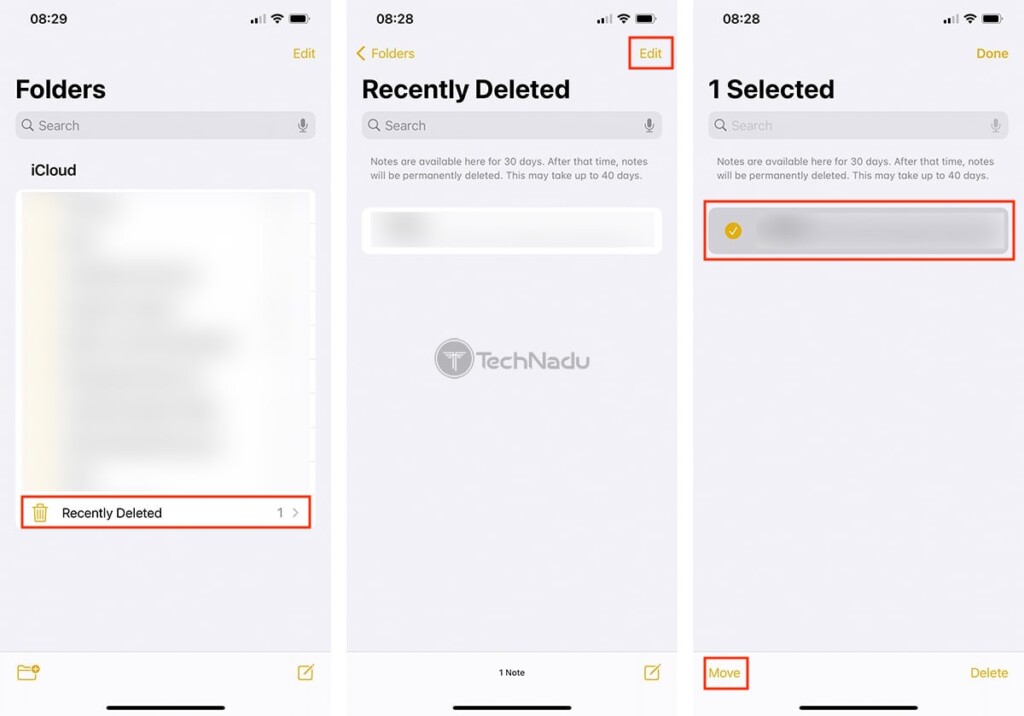
Did you know that the Notes app doesn’t delete your notes automatically? Instead, it stores them in a special folder called ‘Recently Deleted,’ keeping your notes for up to 30 days. Here’s how to access that folder and recover deleted notes on your iPhone.
- Launch the Notes app on your iPhone (or your iPad). Then, make sure that you’re on the ‘Start Page’ of the app. If you’re not, swipe from the left side of your device’s screen, letting you “go back” to the Notes’ initial page (showing a list of folders). At this moment, it should say ‘Folders‘ in the top-left corner.
- Now, take a look at the bottom of that page. That’s where you should find the ‘Recently Deleted‘ folder. Tap on it and access the folder. Hopefully, you should now see a list of your recently deleted notes, which can be recovered. Start by tapping on ‘Edit‘ in the top-right corner.
- Then, tap on the notes you’d like to recover, and finish by tapping on ‘Move‘ (in the bottom-left corner). That will open a new menu, asking you to select a folder. Tap on any of the offered folders, and that’s it!
Method #2: Restore (Permanently) Deleted Notes via Specialized Software (Using Your Computer)
In case you’ve deleted notes from your iPhone permanently, there’s still one way to recover them. Considering that we’re talking about recovering notes on your iPhone without a backup, you should turn to specialized software. So, go through the following steps.
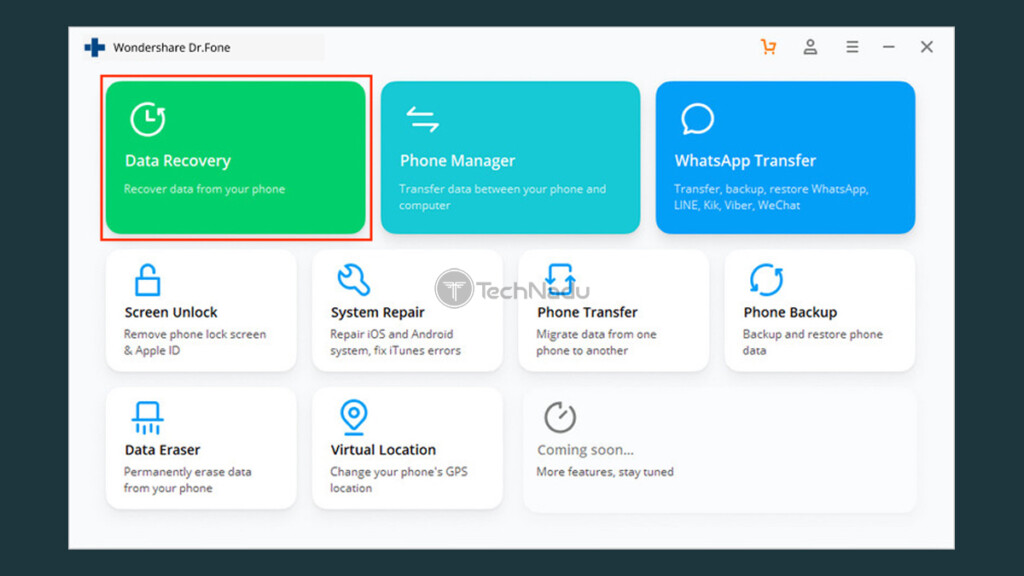
- You’ll find many applications promising to recover lost data from your iPhone. However, based on our experience, we recommend Dr. Fone by Wondershare. Use the provided link to download and then install the application on your computer (you can use Dr. Fone free-of-charge, and it’s available on Windows and macOS).
- Once you install the app, go ahead and open it. Then, click on ‘Data Recovery.’ You will need to wait until this module is downloaded. Once done, click on it again to launch and access this tool.
- If you have not done that already, connect your iPhone to your computer (using a cable). If this is the first time you’re connecting your phone, you will be asked to authenticate this connection. So, tap on ‘Trust‘ (using a prompt that will show up on your iPhone). Then, click on ‘Recover from iOS Device‘ using Dr. Fone’s interface (on the left side).
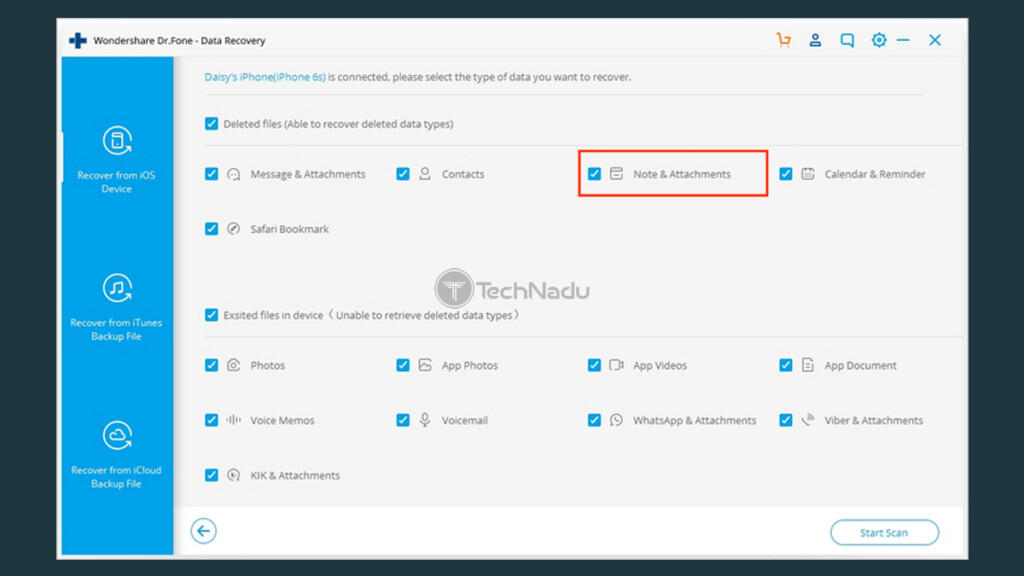
- The application should now list various types of recoverable data. If you want to allow Dr. Fone to check anything that might be recoverable, feel free to keep everything selected. However, if you only want to recover deleted notes on your iPhone, you can go ahead and pick ‘Notes & Attachments.’ This should speed up the recovery process. Then, click on ‘Start Scan‘ in the bottom-right corner.
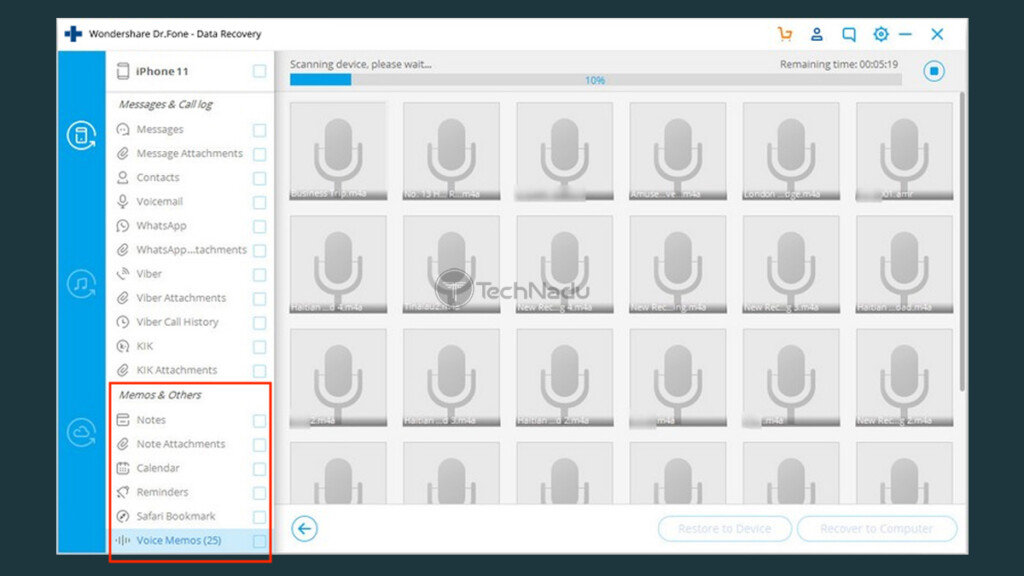
- Depending on the data types you’ve selected, Dr. Fone might take a bit of time to scan your iPhone. In our experience, it can take around half an hour for the application to go through all the possible recovery data. If you’ve only selected ‘Notes & Attachments,’ it shouldn’t take more than a couple of minutes. Once done, take a look at the application’s sidebar (on the left-hand side).
- Pay special attention to the group of data labeled ‘Memos & Others.’ This is where you’ll get to check for any recoverable notes, note attachments, voice memos, and similar. Once you find your notes, make sure to select them. As you’ll see, Dr. Fone gives you a preview of recoverable data, so you can quickly go through your notes. Once you’ve picked the notes you’d like to recover, click on ‘Recover to Computer.’ The application will now try to recover your deleted notes from your iPhone and store them in a ready-to-use format on your computer. That’s it!
This is where we conclude our guide on how to recover deleted notes on your iPhone – without a backup. Make sure to let us know if this article helped you recover lost data. And if you have any questions, let us know via the comments section below. Thanks for reading!
- Is This the End of the Crypto Bull Market? - February 26, 2025
- SEC vs. Ripple Lawsuit Takes a Shocking New Turn - February 25, 2025
- Deep Dive: Why U.S. National Debt Has Reached Unprecedented Levels - February 25, 2025


