Table of Contents
We all keep plenty of personal data on our iPhones. With that said, our photos are perhaps the most precious type of data, as they often hold memories of past events. So, what happens if you delete them by accident? Is there a way to recover permanently deleted photos on your iPhone if you don’t have a backup? The answer is – yes, but it comes with some caveats.
When you delete any type of data, those files don’t actually disappear. Instead, the space occupied by those files is marked as “available,” waiting on new data to overwrite it. That applies to any digital device that has data storage, and it applies to iPhones as well. And also, this is what makes it possible to restore deleted photos, even without a backup.
2 Methods to Restore Permanently Deleted Photos on iPhone – If You Don’t Have a Backup
The best way to restore lost data is via using a third-party application. However, your iPhone also has another trick up its sleeve, keeping your deleted photos still available for up to a month. So, let’s show you what needs to be done.
Method #1: Restore Deleted Photos via Your iPhone’s Photos App
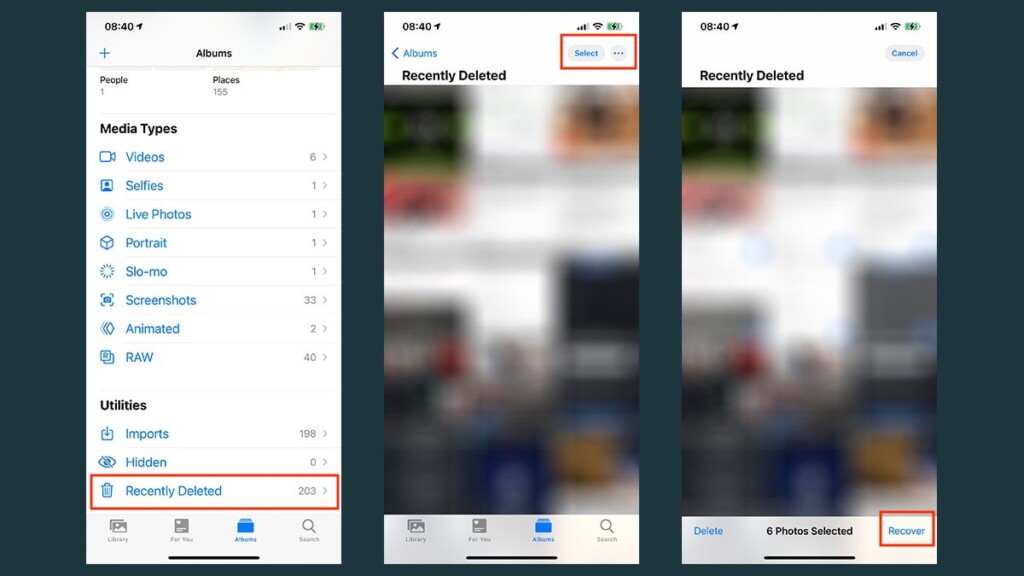
When you delete a photo, did you know that your iPhone doesn’t delete it straight away? Instead, that photo is kept in a special album for up to 30 days. With that said, here’s how to access that album and recover lost photos.
- Launch the Photos app on your iPhone, and then tap on the ‘Albums‘ tab. You will see this tab in the main navigation menu at the bottom of your phone’s screen.
- Then, tap on the ‘Recently Deleted‘ album, followed by tapping on ‘Select.’
- You can now select the photos or videos that you’d like to recover. And if you wish to recover everything you see in this album, tap on ‘Recover All.’
- To recover the selected photos or videos, tap ‘Recover‘ again to confirm. That’s it! The recovered photos or videos will be sent back to the Photos app to the positions they used to occupy.
Method #2: Use a Third-Party App to Recover Permanently Deleted Photos
If the method explained above doesn’t work (if you’ve deleted photos even from the ‘Recently Deleted’ album), there’s another solution to try. We’ll show you how to use a third-party app to scan for recoverable data on your iPhone. So, go through the following steps.
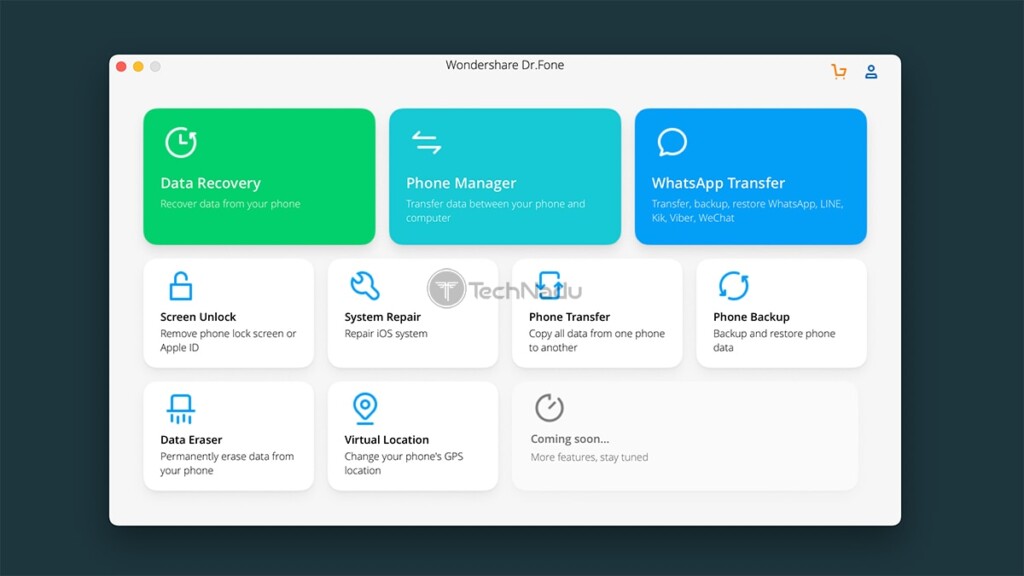
- To recover permanently deleted photos on your iPhone, we recommend using Dr. Fone by Wondershare. Use the provided link to visit the application’s website, from where you can download and install the software.
- Then, launch Dr. Fone. Click on ‘Data Recovery,’ visible in the top-left corner of the application’s interface. Wait a couple of moments until this component is downloaded and installed. Then, click on ‘Data Recovery’ again to open and access this tool.
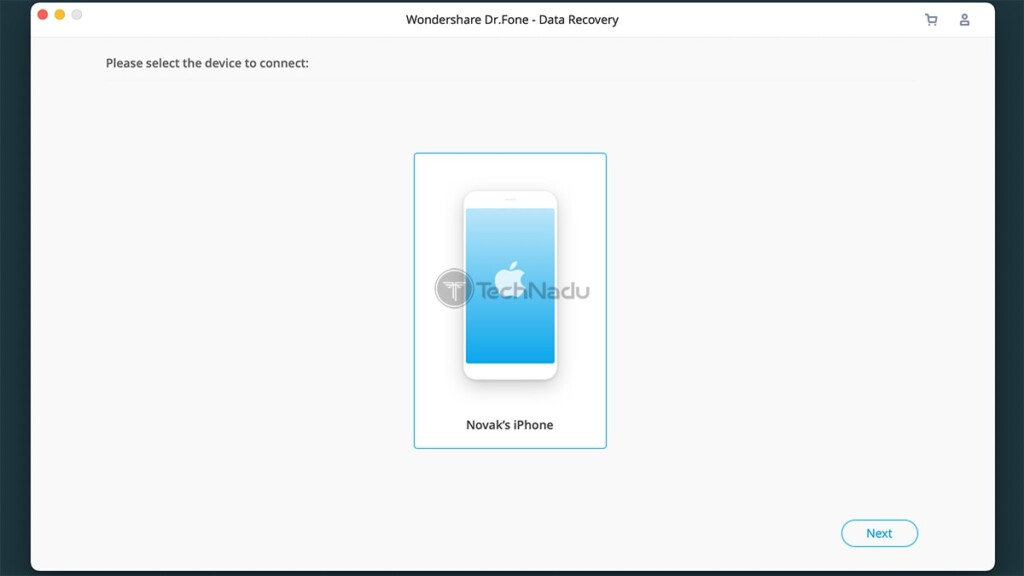
- Make sure to connect your iPhone to your computer. If you’ve never done that before, you’ll be asked whether to allow this connection, so tap on ‘Trust‘ (using your iPhone). Then, you need to click on ‘Recover from iOS Device‘ using Dr. Fone’s interface.
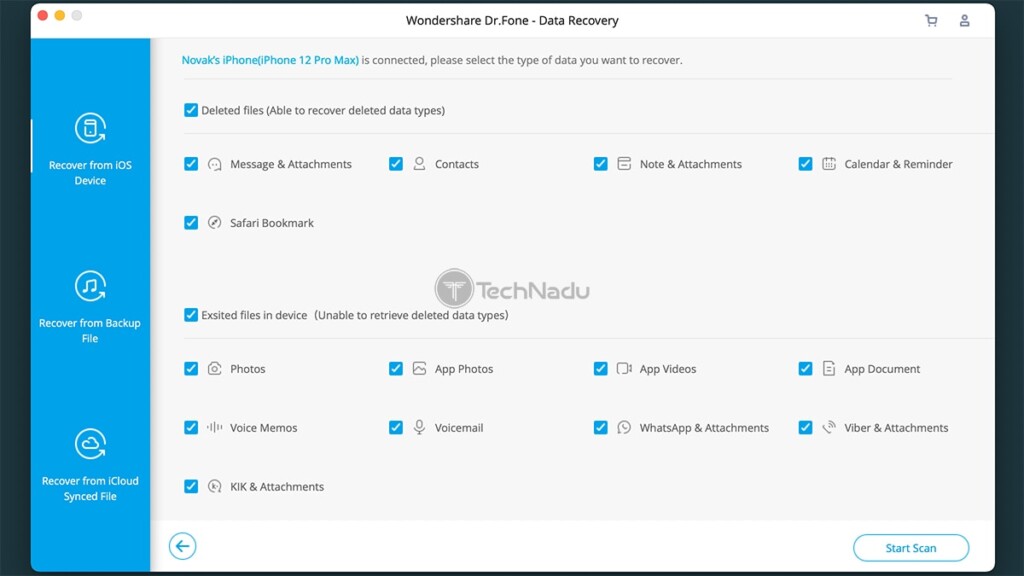
- The application will now ask you to select the types of data that you’d like to recover. Our recommendation is to keep everything selected, as you’ll want Dr. Fone to do a full system scan. Then, tap on ‘Scan.’
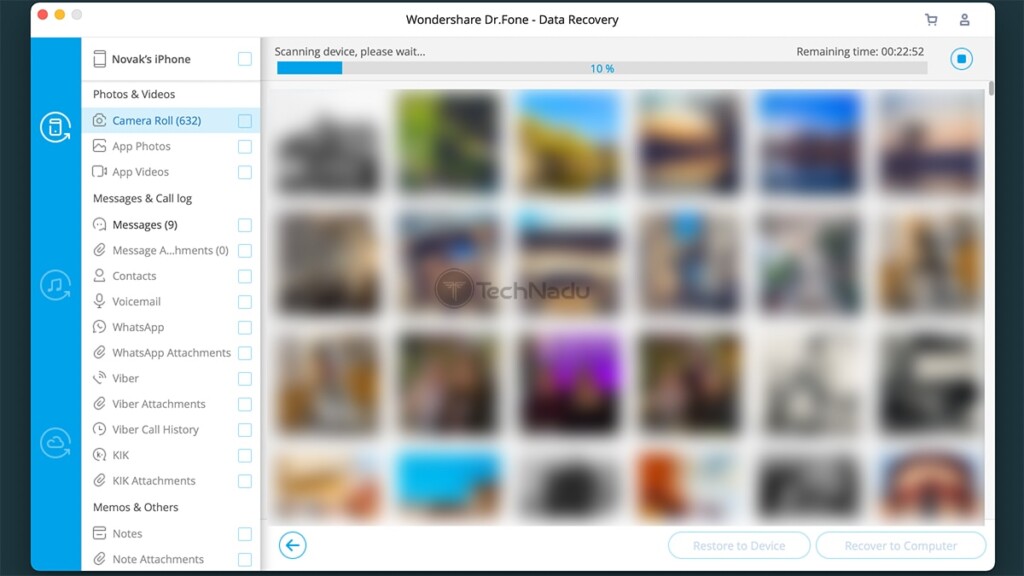
- Keep in mind that Dr. Fone might take around 30 minutes to do a full scan. Once done, the application will show you the previews of recoverable data types. Using the left-placed sidebar, make sure to go through the ‘Camera Roll,’ ‘Photo Stream,’ and ‘App Photos‘ categories. As you click on each of those, Dr. Fone will show you photo previews on the right.
- This is when you’ll need to select the photos that you’d like to recover. Once you’re happy with your pick, click on ‘Recover to Computer‘ (in the bottom-right corner). The application will now start to recover deleted data, which will be automatically saved to your computer (locally). That’s it!
You’ve reached the end of our guide on how to recover permanently deleted photos on an iPhone. If you have any questions, or if you’d like to share your experience of restoring deleted data, make sure to use the comments section below. And finally – thanks for reading!
- CryptoQuant Analyst: Bitcoin Nowhere Near Its Peak – Buckle Up, Hodlers! - December 21, 2024
- Chainalysis: $2.2 Billion Lost to Crypto Hacks in 2024 - December 21, 2024
- Bank of Japan leaves interest rate unchanged: Impact on the macroeconomy and the crypto market - December 20, 2024

