- motherboard ASUS
- RAM 4 GB enough.It is just for running your OS
- SSD to 120 GB
Basic: First, connect the CPU to the system board, insert the cooling fan, and RAM. Connect the solid state drive (SSD) with a SATA cable. Power everything with one PSU – it will be the primary unit. Connect only one GPU at a time.
Windows: Install Windows 10 64bit, go to the default installation, turn off everything you don’t need (Cortana, etc.). Set up your Internet connection and download the motherboard drivers. Continue and install all the drivers offered by Asus.
BIOS: Boot your device, go to the BIOS, and update it to the latest version. You can download it from the Asus website. Paste the latest version of the file into the USB flash drive. In BIOS, press F7 to display advanced system settings, then locate the ASUS EZ Flash Utility, select “USB”, and click the USB flash file.
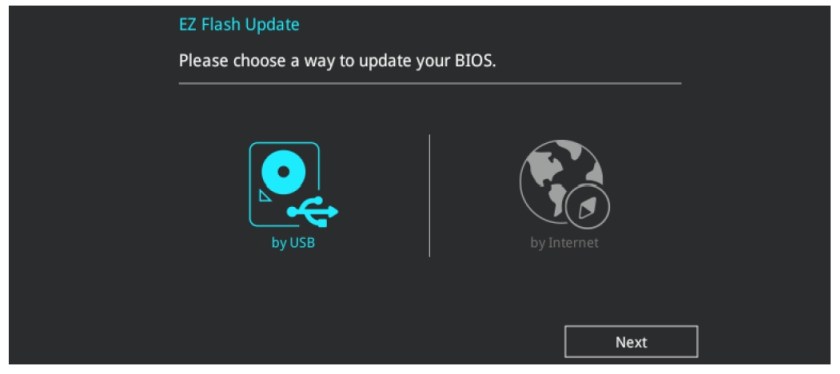
After the BIOS has been successfully updated, you must configure the motherboard for mining. Below you will see a screenshot of the customized settings – found in the advanced settings (F7).
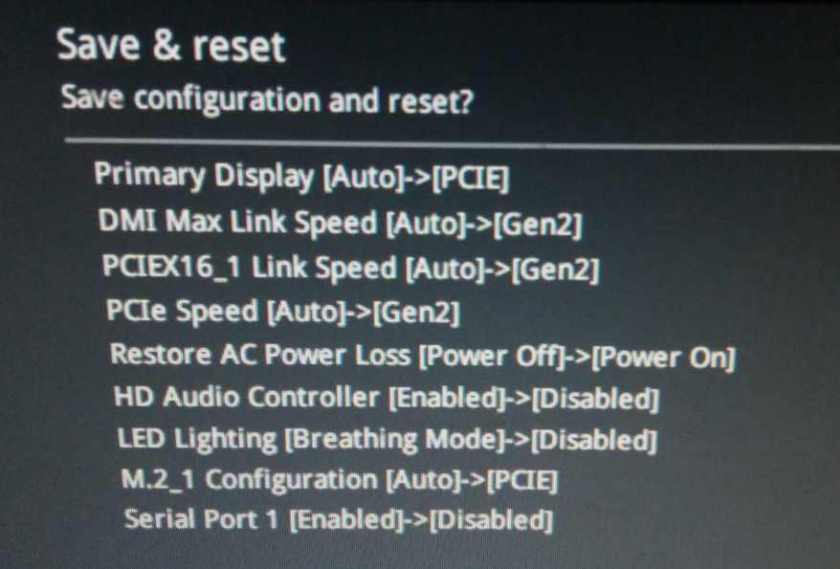
Important: Change the virtual memory size. If you have an 80GB SSD, you can set it to 30,000 MB and disable windows defender.
How to Change the Virtual Memory Size
My Computer> Features> Advanced System Settings> System Properties> Performance> Settings> Performance Options> Advanced> Virtual Memory> Change> Uncheck Automatically Manage Paging File Size For All Drives> Custom Size
How to disable Windows defender
Win + R> type gpedit.msc> Administrative Templates> Windows Components> Windows Defender Antivirus> double-click Turn off Windows Defender Antivirus>enabled>aplly
Installation GPUs: Depending on your graphics card, download the Nvidia driver or AMD driver. Install the driver, restart the rig and make sure everything is working properly. Then restart the rig again, go to BIOS and adjust the following settings: change the status of “Above 4G Decoding” to “enabled”.

Connect all other GPUs. It is better to connect the monitor to the first card (slot # 1) Important: make sure you always connect the cables that the GPU and its riser are powered from the same PSU! Turn on your miner and wait for a while. Windows will detect your GPU one at a time. You may see a black screen, but don’t worry, it’s okay.
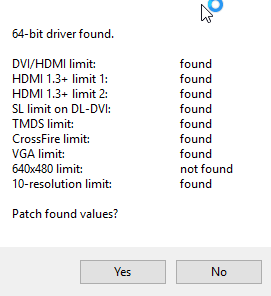
AMD GPDs may have a more complicated problem: the cards have been installed correctly, but each has an exclamation mark. AMD atikmdag Patcher can help. Click “Yes” and after restart the problem is solved!
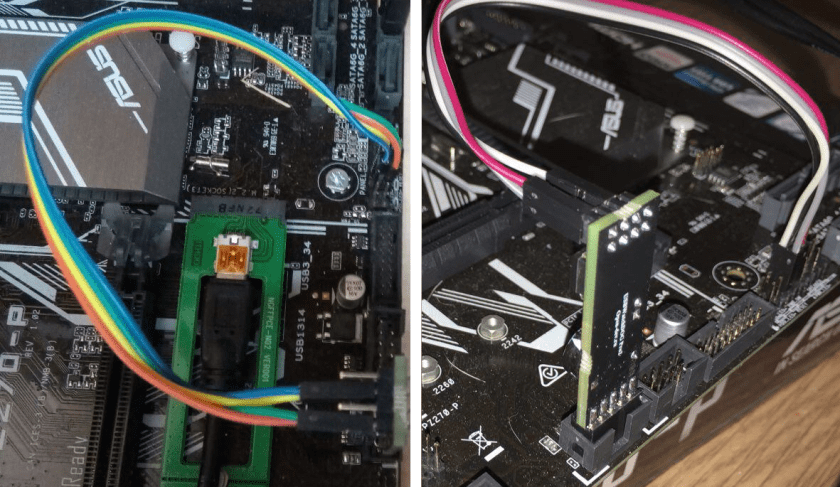
Watch dog: Connect the watchdog to connect the Reset and Power on the motherboard so the timer can reboot or turn on / off the miner.
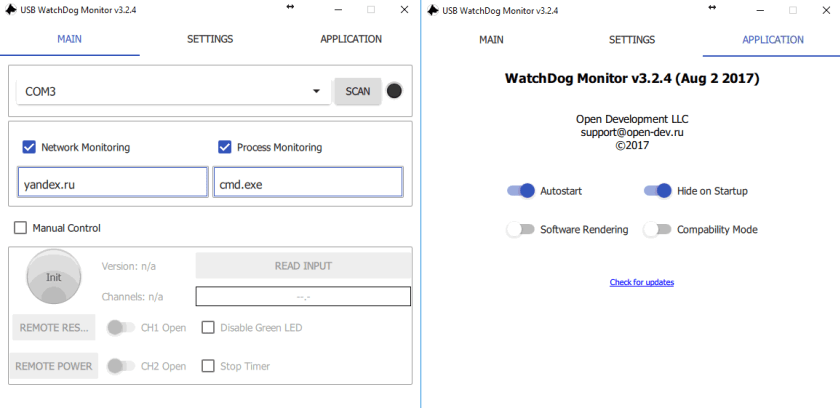
Then install the driver and Watchdog, which can be found on the official website. Enable Autostart and adjust monitoring settings – enable network monitoring and enter “google.com”, then enable process monitoring and enter “cmd.exe”.
A few more things you should do. Prevent system sleep using power settings. You should do this after you have completed everything else, as it may revert to the default settings after installing the GPU drivers.
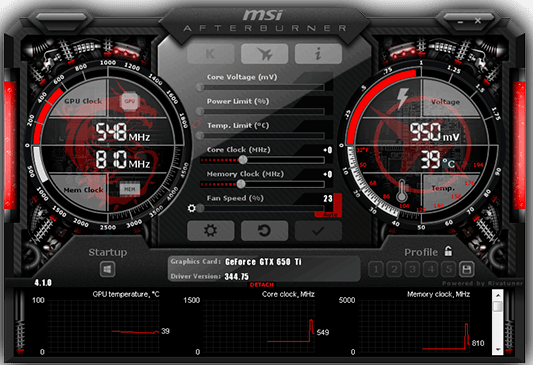
If you plan to overclock GPUs, we recommend that you install Afterburner. For AMDs you’ll need the latest beta version. You can adjust all graphics card settings at your own risk.
Was tested on mining rig with 6 AMD Vega 64 GPUs. 100% working.
- Why Online Advertisers Should Request Website Traffic Data from Google Analytics Instead of Using SEO Tools Like MOZ or Ahrefs? - March 24, 2025
- North Carolina’s Bold Move: State Bill Proposes Investing 10% of Public Funds in Bitcoin - March 22, 2025
- Justin Sun Stakes $100 Million in Ethereum on Lido – What Does It Mean for the Market? - March 19, 2025


