Even though today’s iPhones come waterproof, this wasn’t always the case. And of course, not all of us have the latest smartphones, which means that water damage is something to be concerned about. We’re sure you’ve already experienced that, especially since you’re seeking a guide on how to recover data from water damaged iPhone, especially if it won’t turn on. And yes, we’re here to offer a solution.
As you can already guess, we’ll recommend using a third-party application for this purpose. There are many creative software developers out there who know iPhones from the inside out, providing us with data recovery options. Even though you’ll find plenty of options out there, know that we’ve based this guide on an application that has served us well for a long time now.
7 Steps to Retrieve Data from Water Damaged iPhone (If It Won’t Turn On)
We’re not going to waste any more time, as we’re sure you’re eager to start recovering lost data from your water damaged iPhone. With that said, here’s what you need to do.
- Based on our experience, we’ve decided to recommend Dr. Fone by Wondershare. This is one of the most effective all-in-one applications for recovering lost data, managing backups, and unlocking iPhones. It’s also safe to use as Dr. Fone doesn’t tamper with your device’s operating system. So, use the provided link and download the application (on a Windows PC or Mac).
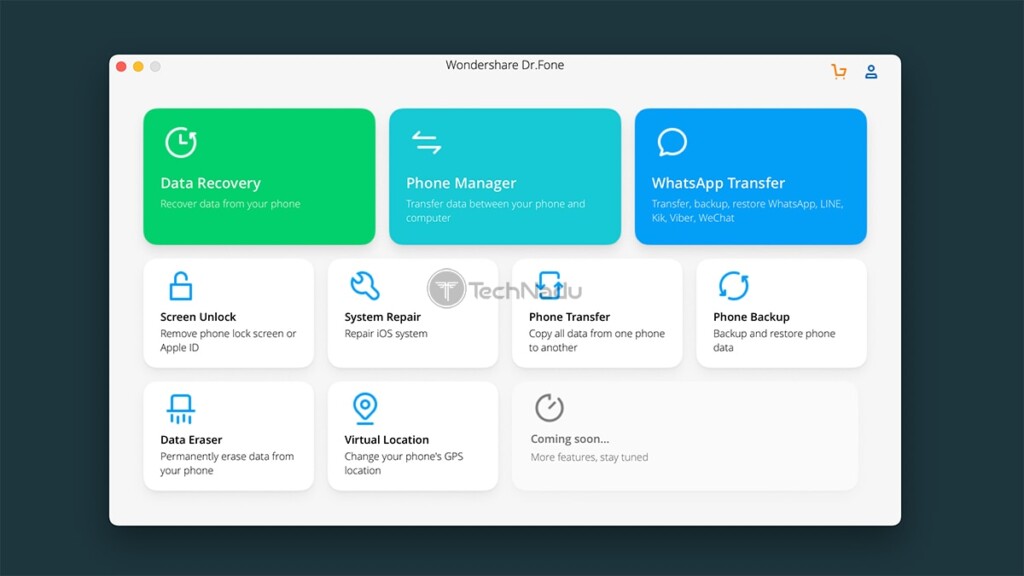
- Then, install the application (like you would install any software) and launch it. As you’ll see, Dr. Fone comes with a nicely designed ‘Welcome Screen,’ showing you a grid of capable and handy tools. You need to go with ‘Data Recovery.’ Once you click on that tool’s name, Dr. Fone will download this component and automatically launch it.
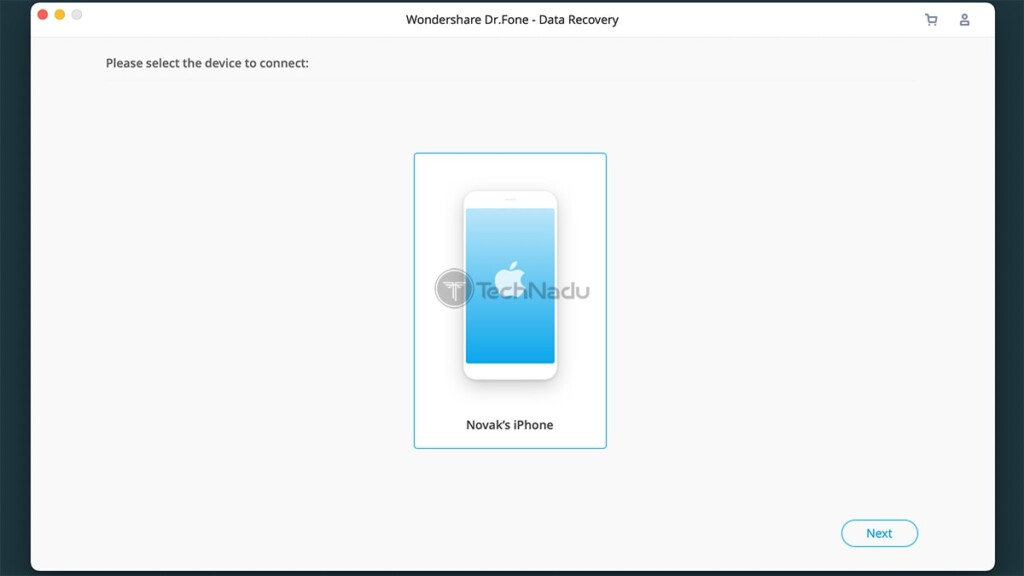
- If you haven’t connected your iPhone to your computer, now is the time to do so (using a USB cable). The application will automatically recognize your device and might ask you to confirm your decision. Then, click on ‘Recover from iOS device.’
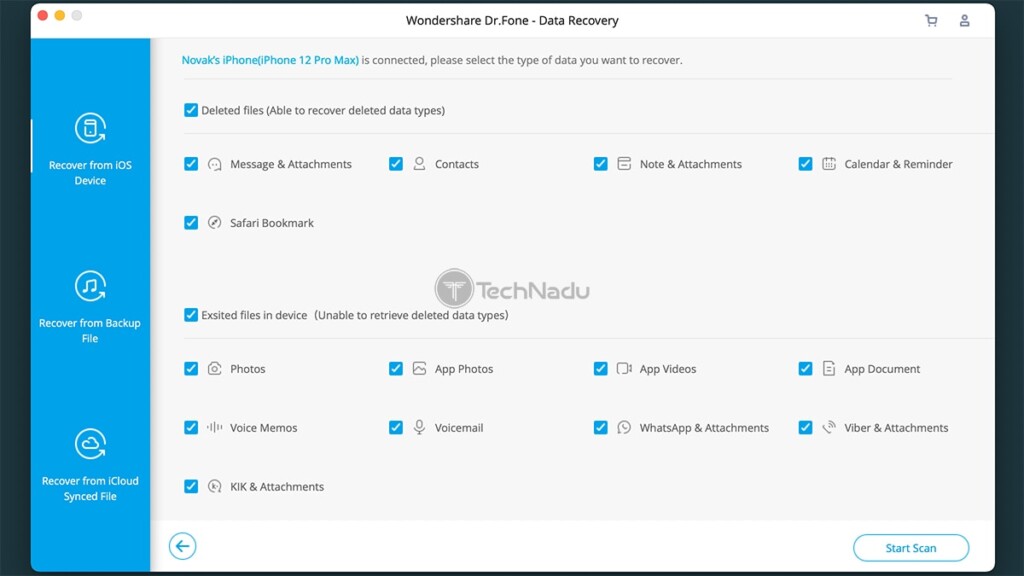
- This is when you will see a long list of data types that can be recovered. Make sure to take a good look at the recoverable file types and select those you would like to retrieve. As you’ll see, you can retrieve photos, videos, messages, voicemail, and plenty more. Once you’re happy with your pick, click on ‘Start Scan.’
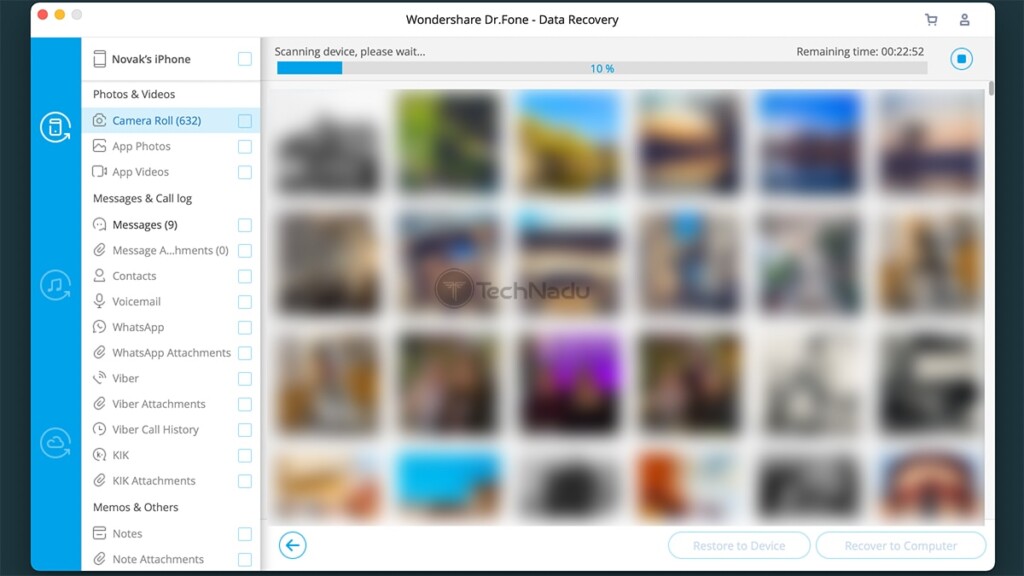
- Keep in mind that Dr. Fone will do a deep iOS system scan. With that said, the process of scanning can take from 20 to 30 minutes, maybe even more. There’s nothing you need to do right now, so wait until the scanning process is done.
- You will then see a list of different data types on the left side of the application’s screen. The rest of the interface will show you previews of your photos, messages, and more. You’re free to select entire data types (like all your photos, for example), or you can select individual files that you would like to recover.
- Once you select the files you want to recover, take a look at the application’s bottom-right corner. You can click on ‘Recover to Device’ or ‘Recover to Computer.’ Since we’re talking about recovering data from a water damaged iPhone, you’ll want to save the files to your computer. That’s it!
Additional Tip – Recover Data from Water Damaged iPhone via Backup Files (iTunes & iCloud)
We hope you understand the importance of backing up your iPhone. In case you’ve backed it up via iTunes or iCloud, there’s another way to recover data from a water-damaged iPhone. And once again, Wondershare’s Dr. Fone will help us out.
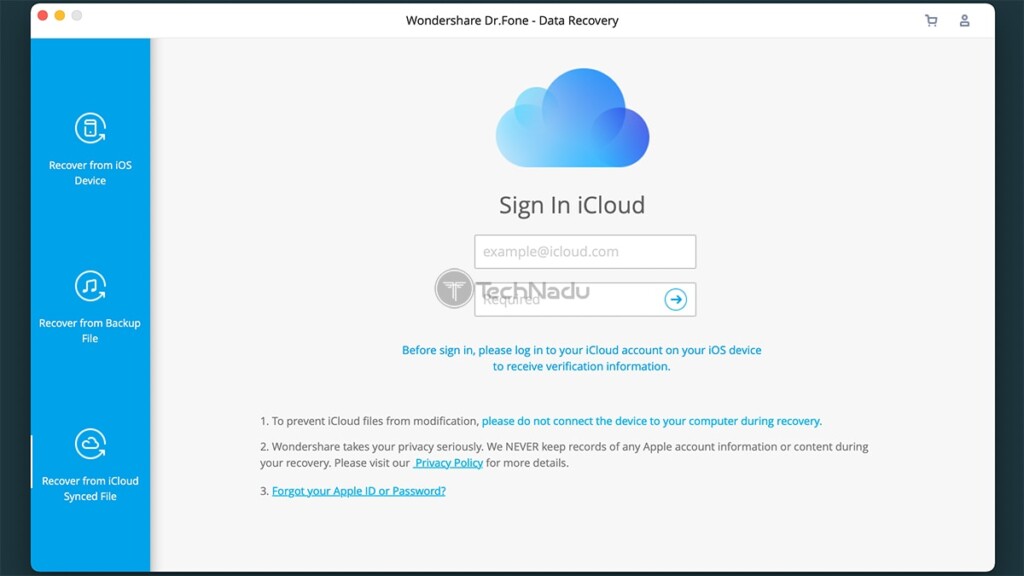
- Launch Dr. Fone and click on ‘Data Recovery.’ Now, feel free to click on ‘Recover from iOS Device‘ – but we’ll only use that option to get to additional tools. You should now see two additional options, labeled ‘Recover from Backup File’ and ‘Recover from iCloud Synced File.’
- If you’ve backed up your iPhone via iTunes, you already have its data locally stored on your computer. To perform a scan, click on ‘Recover from Backup File.’ The application will now scan your computer for locally stored backups. You can also assist the application by clicking on ‘Select’ and finding backup files manually.
- If you’ve backed up your iPhone via iCloud, Dr. Fone can still access those backups and download those files to your computer (which depends on the level of security of your Apple ID). For that purpose, make sure to click on ‘Recover via iCloud Synced File.’ Then, input your credentials, and you will see a list of backup files that can be easily extracted.
With that said, we conclude our guide on how to recover data from a water-damaged iPhone. If you have any additional questions, make sure to let us know via the comments section below. And finally – thanks for reading!
- PlanB Sells All His Bitcoin – The Reason Will Surprise You - February 18, 2025
- Critical Bitcoin Indicator Flashes Red – Analyst Warns of Potential Declines - February 18, 2025
- Ripple’s RLUSD stablecoin trading volume skyrockets: What does it mean? - February 14, 2025

